Search

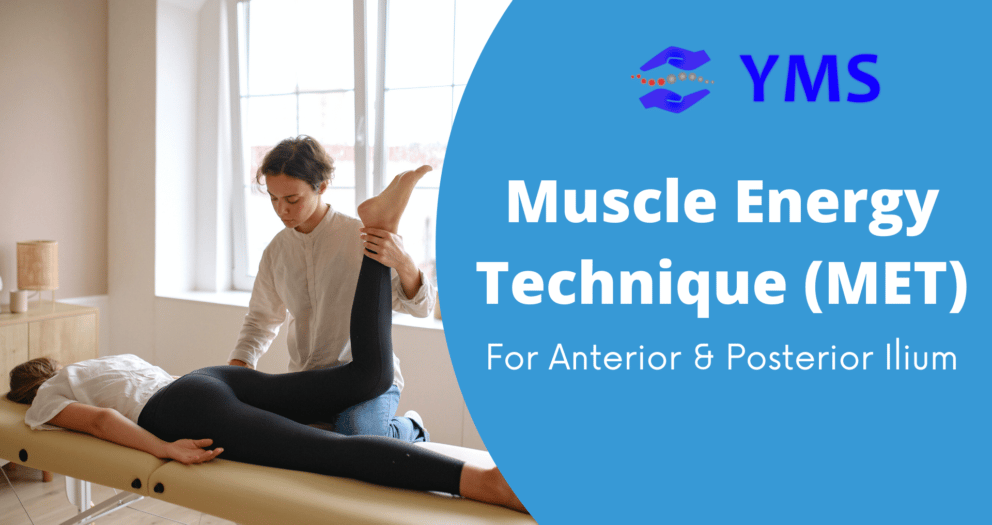
Muscle Energy Technique Blog featured photo

Know some Muscle Energy Technique for Anterior and Posterior Ilium

What Is Muscle Energy Technique?

In 1948, Fred Mitchel Sr, D.O. developed a type of osteopathic manipulative medicine (OMM) known as the "Muscle Energy Technique (MET)." MET improves musculoskeletal function by mobilizing joints, stretching tight muscles and fascia, reducing pain, and improving circulation and lymphatic flow (Waxenbaum, 2020). In simple terms, MET is a hands-on approach to treatment that uses the therapist's manual resistance to help the patient move their muscles. Hence, it is believed to work by mobilizing adhesions and restoring normal joint motion. As a result, MET provides pain relief, improves function, and reduces muscle tension. While the exact mechanisms are still being studied, there's plenty of anecdotal evidence to suggest that MET can be an effective treatment for various conditions.

What Are Some Common Active Technique Treatments Aside from Muscle Energy Technique?

There are many different types of Active Technique treatments, but some of the most common include:

Myofascial release: This involves applying gentle pressure to the fascia (the connective tissue surrounding muscles) to release tension and improve blood flow. There has been some debate about myofascial release, with some questioning its efficacy. However, a growing body of research suggests that myofascial release therapy can benefit many conditions.

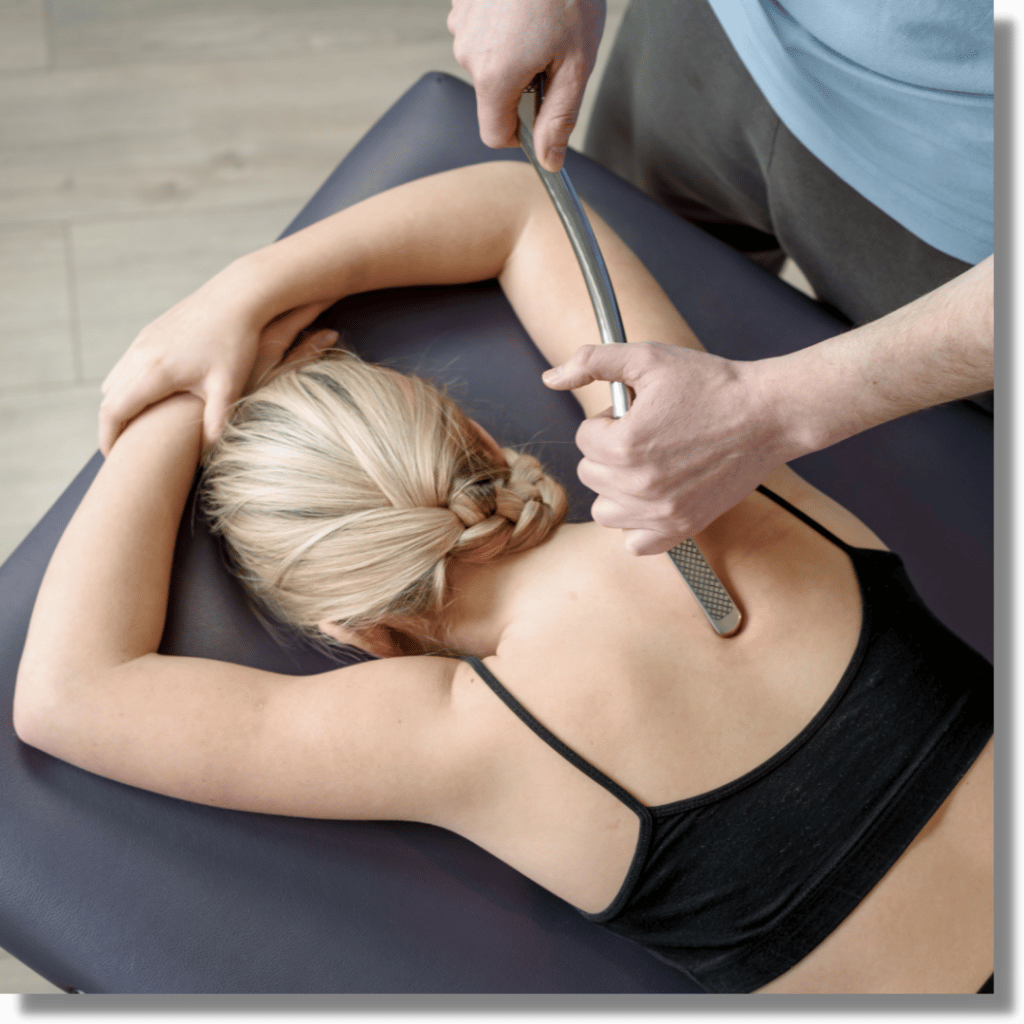
• Muscle stripping: This technique uses manual resistance to "strip" or lengthens muscles. So, what is muscle stripping? Muscle stripping is a technique that uses manual pressure and movement to separate and stretch the muscle fibers. This is said to help improve blood circulation and promote the healing of injured muscles.

It's used to treat a variety of issues, such as Tendonitis, Muscle pain, Scar tissue, Stress, Fractures, Muscle Knots

Furthermore, muscle stripping is a massage used to treat muscle pain and tension. It is believed to work by breaking up knots and adhesions in the muscles, which can relieve pain and improve flexibility. This procedure is generally performed on the abdomen, hips, and thighs. To perform muscle stripping, the therapist will first apply a layer of oil to the area that needs treatment. They will then use their fingers or a tool to massage and stretch the muscles, which helps break down any knots or tension. This process is repeated until the therapist is satisfied with the results.

Moreover, the side effects of muscle stripping can vary depending on the individual but may include swelling, bruising, pain, and numbness. In some cases, patients may experience temporary difficulty walking or standing.

Nevertheless, muscle stripping is often used to treat chronic pain, tension headaches, and carpal tunnel syndrome. It can also be helpful for athletes who are looking to improve their performance and reduce the risk of injury.

• Isometric holds: In this treatment, the therapist will ask the patient to contract their muscles against resistance for a certain period. This treatment is thought to help relieve muscle tension because it causes the muscle fibers to stretch and recoil. This helps break down the knots or adhesions that can form in the muscle tissue, leading to pain and tension.

You'll need to find a sturdy surface like a table or countertop to do an isometric hold. Place your hand on the surface and squeeze your hand and forearm muscles as hard as you can for 10 seconds. Release and rest for 10 seconds, then repeat the hold for another 10 seconds. Do this for a total of three rounds.

So, what are the risks of isometric holds? Well, like any type of exercise, there is always a risk of injury. If you're not careful, you could end up straining or even tearing your muscles. That's why it's important to start slowly and gradually build up the intensity of your holds.

Another thing to watch out for is cramping. If you hold your muscles in a static position for too long, you might start to experience cramps. This is usually nothing to worry about, but you should speak to your therapist if the cramps are severe or persistent.

There are a few occasions when you should avoid doing isometric holds. If you're pregnant, have high blood pressure, or are recovering from surgery, it's best to speak to your musculoskeletal specialist before starting this treatment. Additionally, it's important to stop and consult your musculoskeletal specialist as soon as possible if you experience any pain or discomfort during an isometric hold.

How Can Muscle Energy Technique Help With Anterior and Posterior Ilium Pain?

Here are some ways on how Muscle Energy Technique (MET) can help with anterior and posterior ilium pain:

Stretching the muscle helps to lengthen it and improve flexibility. When the muscle is flexible, it can work more efficiently and with less tension. This can help to reduce pain and discomfort.

Breathing helps to control muscle tension and relaxation. It also helps improve blood circulation, providing more oxygen and nutrients to the muscle. This can further reduce pain and discomfort, as well as improve healing.

To maximize the effects of MET, you can also do follow-up self-massage at home. Self-massage helps break up scar tissue and adhesions, which can cause pain and restrict movement. It also helps to increase blood circulation and improve healing.

Does Muscle Energy Technique Have Any Side Effects?

There are some risks associated with using Muscle Energy Technique. As with any physical therapy, there is always a chance of injury. You could pull a muscle or even damage your joint if you're not careful.

Another thing to be aware of is that MET can be pretty intense. Some people find it uncomfortable, and it can take a while to get used to the sensation. It's important to start slowly and build up your tolerance gradually.

As with any musculoskeletal treatment, always consult a musculoskeletal specialist like Paula Nutting before starting MET. They can advise you on whether it's the right choice and help you avoid any possible side effects.

How to Address Anterior and Posterior Ilium Pain?

Anterior and Posterior Ilium Pain can be addressed through stretching, breathing, and self-massage. Stretching is key to releasing tension in the muscle and preparing it for movement. A good stretch technique is important to elongate the muscle without causing pain or discomfort.

Breathing is also essential for effective MET. You need to ensure you're breathing deeply and rhythmically to get the most out of the stretch.

Finally, self-massage is a great way to release any tension that has built up in the muscle. A good massage technique will help increase blood flow and reduce inflammation.

How Can I Stretch Effectively?

There are a few things to keep in mind when stretching effectively.

First, always warm up your muscles before stretching. This can be done by taking a light jog, jumping jacks, or simply marching in place.

Second, be sure to hold each stretch for at least 20 seconds. This will allow the muscle to relax and lengthen.

Third, don't bounce as you stretch. This can cause the muscle to tear and may lead to injury.

How Can I Stretch Effectively?

When using Muscle Energy Techniques, breathing deeply and rhythmically is important to achieve the best results.

Not only does this help to relax the body and clear the mind, but it also helps move the energy around the body correctly.

Deep diaphragmatic breathing is done by contracting the stomach muscles to push the air out of the lungs. It allows you to use 100% of your lung capacity and increases your lung efficiency.

How Can I Self-Massage Effectively?

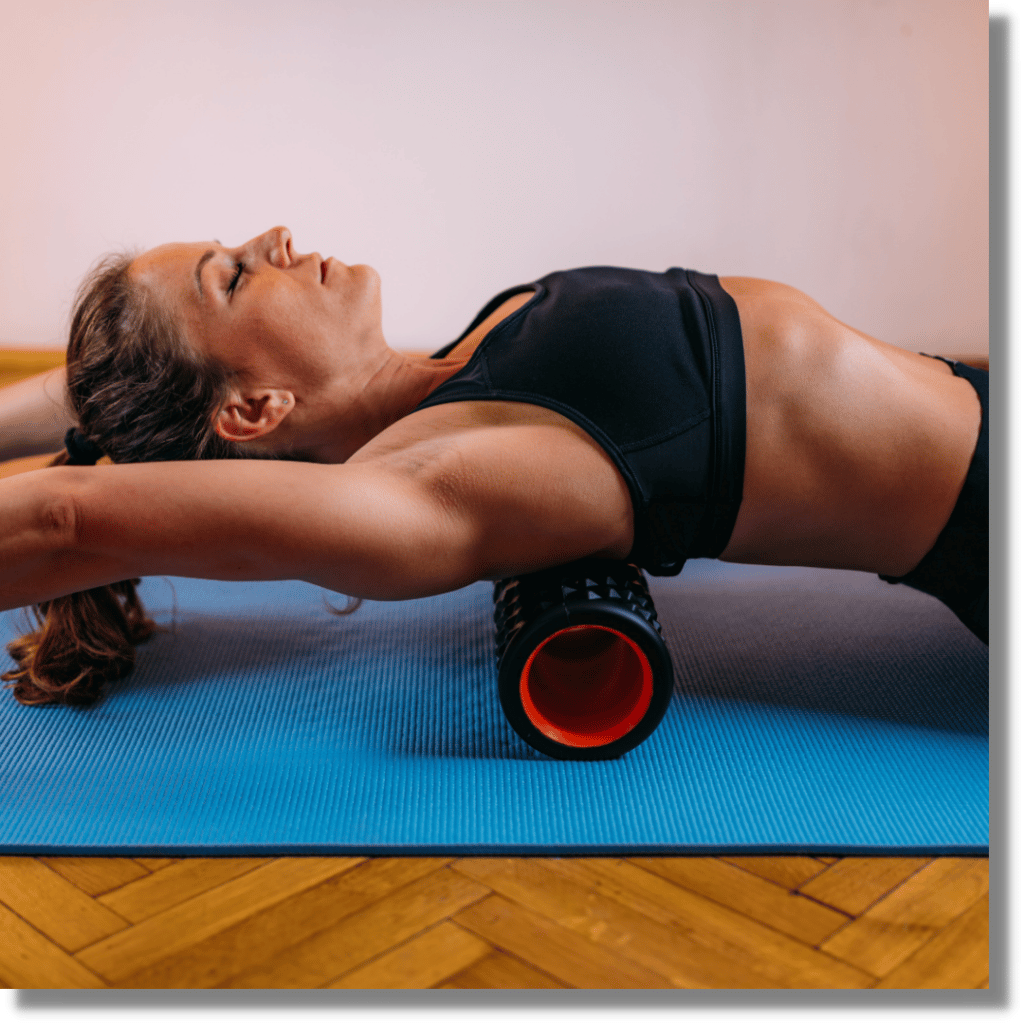
There are a few ways to self-massage effectively. One is to use a massage ball or foam roller to target specific muscles. Another is to use your hands to massage the affected area. And finally, you can use a technique called compression massage, which involves pressing down on the muscle with your fingers or thumbs. 

Watch This Video and Subscribe to Learn More!

Searching for effective techniques to resolve your patient's hip pain? Paula Nutting, Your Musculoskeletal Specialist, discusses Anterior and Posterior Ilium pain relief using Muscle Energy Technique (MET). Try it now! click here

https://www.youtube.com/watch?v=zLQnZ2CqghY

"Having a great time reading this article, share it with with your friend or other people who you think will benefit with this post..."

Check out other recommended articles: Click Here

References

Stenersen, B., & Bordoni, B. (2022, January). Osteopathic manipulative treatment: Muscle energy procedure - cervical vertebrae. National Library of Medicine. Retrieved July 7, 2022, from https://www.ncbi.nlm.nih.gov/books/NBK560706/

Cleveland Clinic. (2022, March 30). Diaphragmatic breathing exercises & benefits. Retrieved July 7, 2022, from https://my.clevelandclinic.org/health/articles/9445-diaphragmatic-breathing

Physiopedia. (2022, April 13). Muscle energy technique. Retrieved July 7, 2022, from https://www.physio-pedia.com/Muscle_Energy_Technique

Fleckenstein, J. (2010, February 11). Discrepancy between prevalence and perceived effectiveness of treatment methods in myofascial pain syndrome: Results of a cross-sectional, nationwide survey - BMC musculoskeletal disorders. BioMed Central. https://bmcmusculoskeletdisord.biomedcentral.com/articles/10.1186/1471-2474-11-32
Muscle Energy-Technique-for-Shoulder Rotator Cuff Pain Chapmans Reflexes

Muscle Energy Technique (MET) for Shoulder Rotator Cuff Pain

Overview 

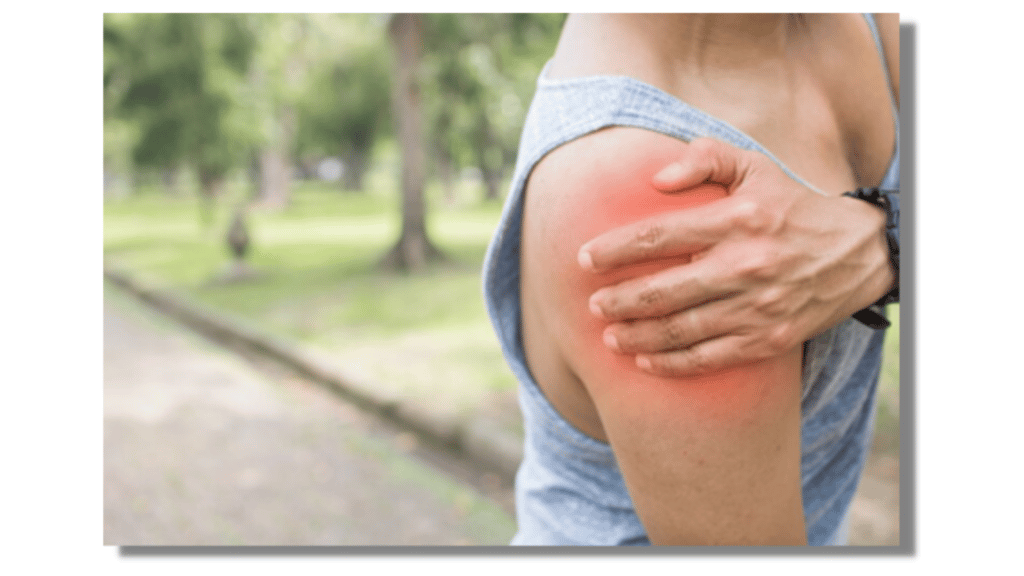
Learn Muscle Energy Technique Shoulder Rotator Cuff Pain today. If you’re suffering from rotator cuff pain, don’t worry! It’s completely treatable. For those with shoulder pain due to rotator cuff tendonitis, inflammation, or impingement, applying a Muscle Energy Technique (MET) may be just what you need to treat your condition and get back to your daily activities without pain interfering with your quality of life. In fact, our recommended treatment is one of the most effective non-surgical solutions available today.

Muscle Energy Technique for Shoulder Rotator Cuff Pain- Chapmans Reflexes Blog Image

Related Article: Neck and Shoulder Office Exercise

Why do we need rotator cuff muscles?

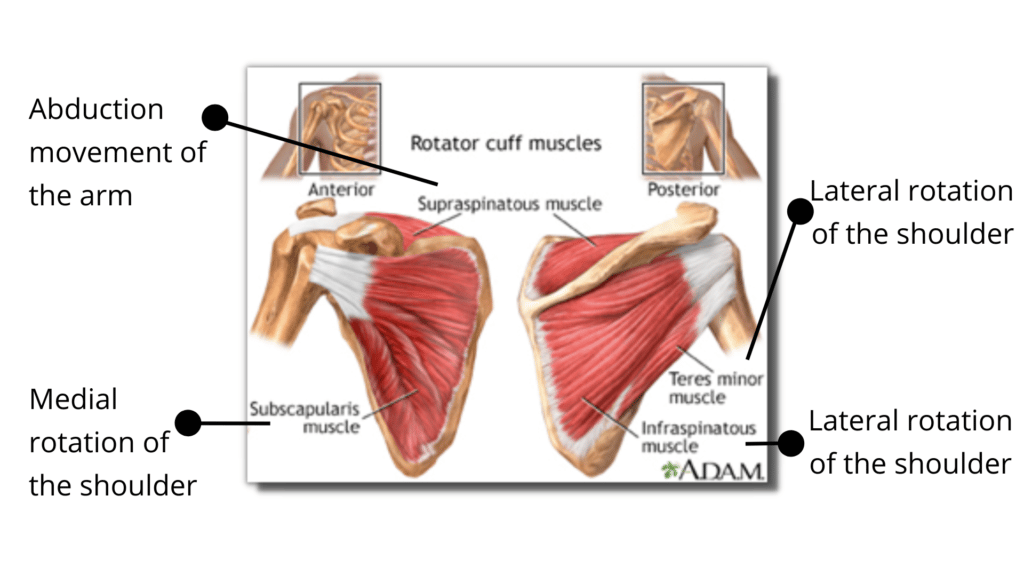
According to Athwal (2017), the rotator cuff is a set of four muscles that form a "cuff" over the head of the humerus via tendons. The scapula leads to the four muscles that make up the following muscles:

Rotator Cuff Muscles and four parts- Chapmans Reflexes Blog Image

Photo courtesy of A.D.A.M., INC.

The larger and lesser tuberosities are where the rotator cuff tendons join to the humeral head. These muscles altogether allow the rotator cuff to perform its important role of arm lifting and rotation as well as the stabilization of the shoulder's ball within the joint (Maruvada et al., 2021)

What is a Muscle Energy Technique (MET)?

Muscle Energy Technique (MET) is a type of soft tissue manipulation used to treat muscle imbalances and other issues. This was developed by Fred Mitchell, Sr. and Fred Mitchell, Jr. In MET, small contractions are used to stretch a tight muscle while they’re in their shortened state. The purpose of MET is to gain control over trigger points and improve mobility in muscles with limited range of motion. MET is an active approach in which the patient acts as in active participation, as opposed to static stretching, which is a passive technique in which the therapist does all of the work.

MET can be beneficial for improving stability in both shoulders. Athletes who perform overhead movements, like baseball pitchers or swimmers, tend to experience shoulder pain due to injuries like rotator cuff tears or labral problems. While steroids injections can help reduce shoulder pain and inflammation caused by these conditions. They only treat symptoms—not underlying causes of shoulder pain. In addition, it may have negative side effects if not administered correctly by professionals.

Related Article: Muscle Energy Technique Your Therapist Does For You

When should you use muscle energy technique (MET)?

Muscle Energy Techniques can be utilized for any issue where the goal is to relax and lengthen muscles while also improving joint range of motion (ROM). Almost any joint in the body can be safely treated with METs. A lot of athletes employ MET as a prophylactic treatment to avoid muscle and joint injury in the future. It is mostly utilized by those who have limited range of motion in their neck and back owing to facet joint dysfunction. Likewise, for larger issues including shoulder discomfort, scoliosis, sciatica, asymmetrical legs, hips, arms. It could also treat persistent muscular pain, stiffness, or injury.

Muscle Energy Technique (MET) for Shoulder Rotator Cuff Pain

How do you perform Muscle Energy Technique (MET)?

Muscle energy technique is effective for shoulder pain relief and it's easy to learn which is why its use in recent years have increased. Here's how you can do it for your patients. 

Physical Examination (Muscle Energy Technique Shoulder)

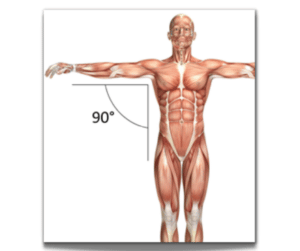
You will have to look at the natural range or passive range of movement of the patient. Have your client lie supine and you move their arm into abduction to a 90° angle.

External rotation of the shoulder, natural range or passive range of motion ROM should be between 80 and 90° degrees-Chapsman Reflexes Blog Image

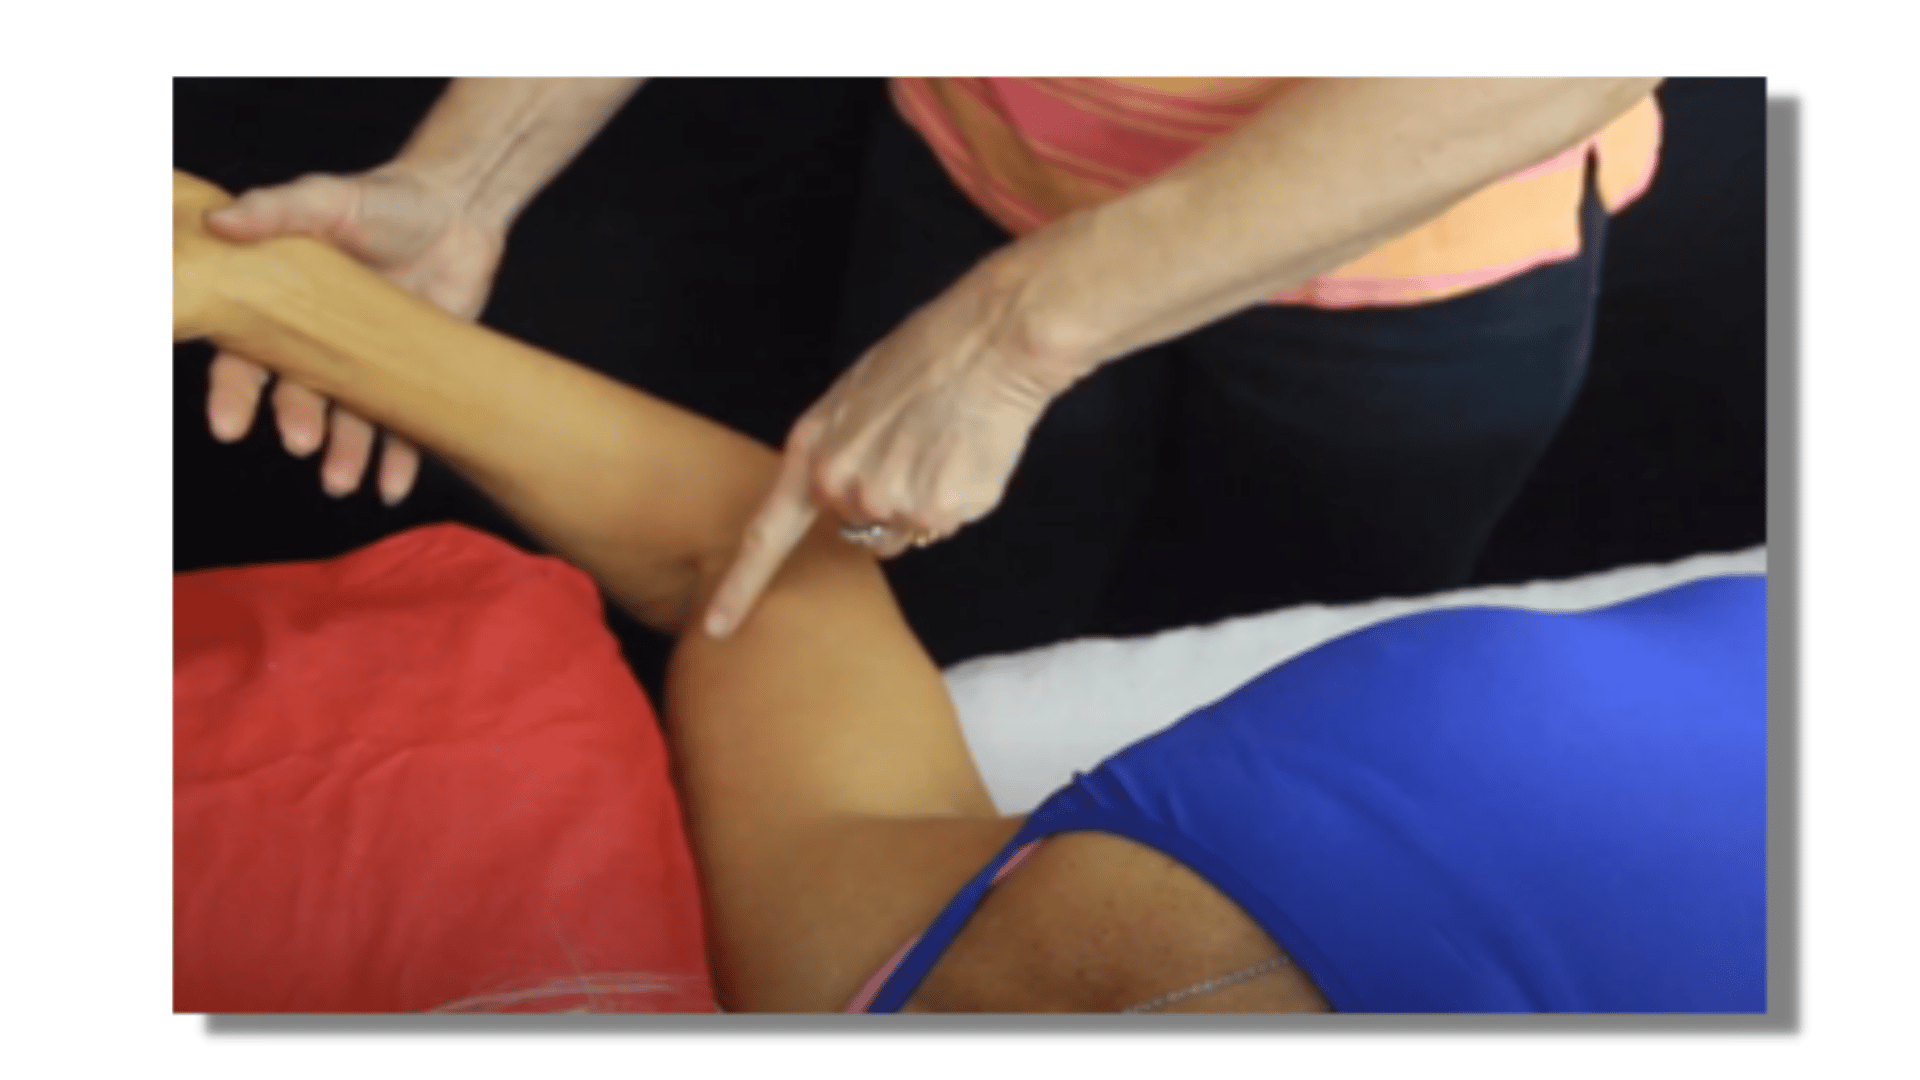
Bend the elbow and passively check for external rotation of the shoulder as seen in the photo below. You are assessing their current ROM or the limits to their range of motion, normal range should be between 80 and 90°. If the range of external rotation is less than these numbers it can indicate that either the pectoralis major, the latissimus dorsi, and/or the teres major may be inhibited and shortened, which decreases this range performed within the upper extremity.

Next, check the internal range of the arm. Move the arm passively into internal rotation. The normal range is 70° to 90° with any limitations perhaps coming from dysfunctions in either or both the subscapularis or teres minor muscles. We also note for any ‘hard end feel’ which may indicate bony issues which means we would do further joint assessments.

internal rotation, internal range of the arm should be between 70 and 90° degrees- Chapsman Reflexes Blog Image

Performing Muscle Energy Treatment (MET) Shoulder

Move their forearm into an external rotation to perform MET. It is important that you stop at the first point where you feel restriction of the tissues. This is called Point of Bind and is at this length of the tissues that we get optimum results. They contract back towards internal rotation at 40% of the effort and no more; it is an isometric contraction where you are stabilizing the wrist and elbow to keep the joints motionless. This contraction is held for approximately 7 to 10 seconds. Ask your patient to take a deep cleansing breath and as they exhale they stop applying pressure of the muscle contraction. Keep in mind that it's important that their arm doesn't move. You will still be holding the wrist and elbow through the entire procedure and finding a new point of bind after each of the post-contraction relaxation phases.

Post-contraction Relaxation Phase

This time called Post-contraction Relaxation is when the tissues that had been contracting relax even further. We stay in limb ‘stiffness’ for up to 90 seconds and in this time the muscles relax even further so that we find the new passive end range or apply our new point of bind. Ask the patient to apply the contraction into internal rotation, still at 30% to 40% of their effort. This contraction again should be a minimum of 7 - 10 seconds. We get them to take cleansing breaths on each exhalation to improve the parasympathetic effect on the tissues; they can relax their muscle contraction as they breathe out.

Important Notes

Do the technique 3 times to see the most effective changes. Tell them to take a deep cleansing breath and that they relax the muscle contractions as they exhale. We reassess the ROM of external rotation after the third contraction and relaxation phase and we should see greater evidence of improved length through that range of motion.

This is a gentle technique for patients that feel pain and/or for those with issues in their range of motion. You might not want to use this treatment when there's a bony block when you test out the ranges. Be aware that if there's a joint restriction, we'd apply a mobilization technique or we'll adjust something deeper into that joint capsule.

Related Article: Best Pain-Free Subscapularis Massage for Shoulder Pain

Watch this Video

Here's the most effective video where you can see how to do this Muscle Energy Technique. It's a simple yet effective way to address the restrictions created by hypertonic internal rotators and gives more balance to their external rotator counterparts! Watch to go through these steps so you can practice from your clinic and also what homecare you can offer your patients when they are not in your practice.

References

Athwal, G. S. (2017, March). Rotator Cuff Tears. American Academy of Orthopaedic Surgeons. Retrieved February 20, 2022, from https://orthoinfo.aaos.org/en/diseases--conditions/rotator-cuff-tears-frequently-asked-questions/

Maruvada, S., Madrazo-Ibarra, A., & Varacallo, M. (2021, May 8). Anatomy, Rotator Cuff - StatPearls. NCBI. Retrieved February 20, 2022, from https://www.ncbi.nlm.nih.gov/books/NBK441844/

Muscle Energy Technique for Neck Pain by Therapists

Whenever we spend LONG hours at work in front of our computers, we tend to strain our necks. Depending on the position and how long we keep our neck in that same position will determine where your neck will feel worse. In this article, we will talk more about Muscle Energy Technique your therapist does for you. Imagine you’re sitting down all day with your head in a forward position straining your eyes as you peer at the screen. This will not only strain your eyes but would also tighten your neck muscles and any sudden movement can definitely trigger strain which can both hurt and affect your neck. This is almost related to the previous article I shared with you about stretching your muscles to help ease the pain in your neck and back as well as in your hands and arms, but this time, we’ll focus on the neck area and how you can do the simple neck stretching and exercises to make sure that you prevent misaligning and straining your neck while working from home. There are a lot of exercises that you can do at home for your neck. Depending on what exercise you do, with proper procedures and movements, you would be able to loosen those tight neck muscles and improve your neck position and posture. And there are just simple exercises that you can do within a few minutes during your break or before you get back to working on your computer again.  Watch the video. For this purpose, I’m going to share with you ‘one of the BEST’ options and that is using muscle energy techniques!! These are easy ways to self treat to relieve neck pain, balance straining neck muscles, and improve your neck position.

More about Muscle Energy Technique

So what do I mean by Muscle Energy Technique your therapist does for you? Muscle Energy Techniques (METs) are used by physical therapists, manual therapists, athletic trainers, chiropractors, massage therapists, and even osteopathic physicians for the purpose of improving the state of musculoskeletal functions or even joint functions of the body to improve posture, loosen muscle and joint tension as well as relieve pain. MET's work by carefully positioning a specific area in our body and resisting movement or contracting your muscles followed by stretching your muscles to loosen and lengthen your target or opposite muscle group. This technique is usually applied to your body by licensed professionals, therapists, physicians, and should not be practiced at home without consulting your therapist or physician. However, there are a few simple exercises from METs that you can actually try and do in the comfort of your home while working and sitting in your home office.

How to align and loosen your neck muscles

Here are the steps that you should do to align and loosen up your neck muscles.
  1. While sitting down, drop your head and tuck your chin close to your chest. 
  2. Placing your hands on the back of your head to add a gentle weight will give traction to the back of the neck. 
  3. Hold your head down in place with your hands while inhaling for the count of 10. (What’s actually happening at this moment is that you’re contracting the muscles in your neck.) Remove your hand and slowly relax and breathe out.
  4. Take the pressure off after those 10 counts and bring it back to upright for 2-3 inhalations. 
  5. Repeat this process 2 more times and take the opportunity to really enjoy the feeling of muscle contraction in your neck as you press into your hands and the sensation of relaxation as it slowly loosens up. 
  6. Doing this will help stretch those irritated neck muscles as a muscle in an isometric contraction usually lengthens once OFFLOAD. This one works well with your trapezius and your mid-back. 
This gentle yet simple application of a neck MET is one that you can definitely do without the supervision of your physical therapist. You can do these every day before working or even while you're working or taking your break. BUT if you do have a pre-existing injury, disc bulge issues, nerve pain, or unstable/recent bony fracture then make sure you get the TICK of approval from your clinician of choice. Well, that’s just about it. I hope you learned a lot and enjoyed our topic for today. Let me know what you think in the comments below. 
Blog Image about Relief from Sub Occipital Pain – Effective Solutions with Manual Technique (1)

Effective Solutions of Sub Occipital Pain with Manual Techniques

Suboccipital pain is a common type of chronic neck pain. It affects millions of people around the world, which makes it one of the most common types of neck pain. 

Even though the primary cause of this type of pain is unknown, there are effective treatment options that can help relieve the symptoms. 

If you’re reading this article, it’s probably because you already know something needs to change in your life and that you’ve tried everything else. 

There are so many reasons why we need to take action against suboccipital pain – not only for our health but for our well-being as individuals too. 

What is Suboccipital Pain? 

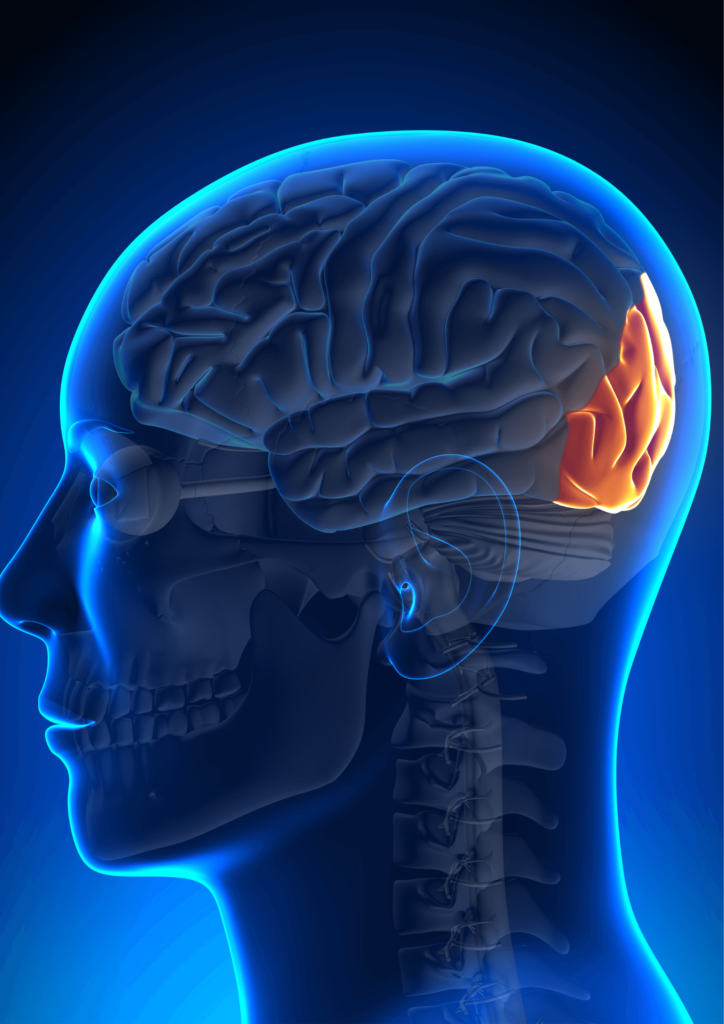
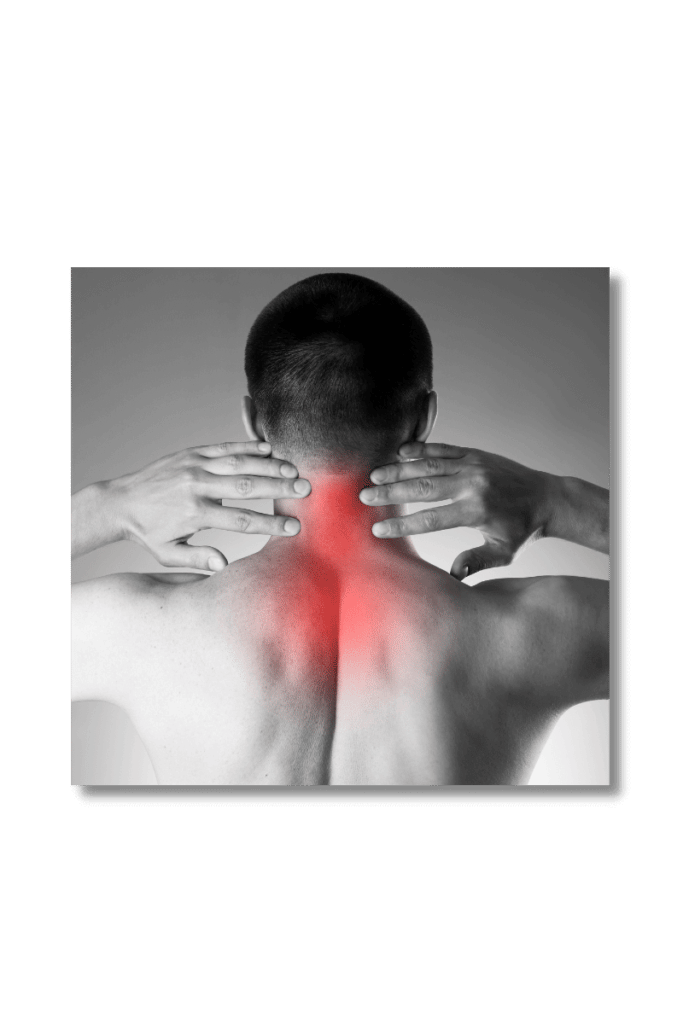
x-ray visual of sub occipital pain of a man

It is a condition that is commonly caused by tightness in the muscles and connective tissues around the base of the skull. 

It can also be caused by compression of the nerves in this area. This condition can be very debilitating and cause a great deal of pain.

Causes of Suboccipital Pain

The suboccipital muscles attached to your occiput can be tender and sore if you sit at a desk or in front of a computer for long periods of time. It is common for people who sit for long periods of time to develop tension headaches. These muscles help to keep the head in place and prevent cervical vertebrae misalignments.

  • Prolonged tilting of head especially while working at the desk or when reading
  • Prolonged tilting of the head backwards or on the side especially when you are tucking a phone between ear and shoulder , when watching a screen located to your side, when the person you are talking to sits next to you, when doing painting jobs or when climbing
  • Cold draught which happens when your muscles are tired and got shortened for a longer time and you got exposed to cold draught (I suggest you put a scarf around your neck to avoid this)

Manual Techniques Never Seen for Reduced Neck Range of Motion that may Create Pain

1. Sub Occipital Pain Midfoot  Massive Supination

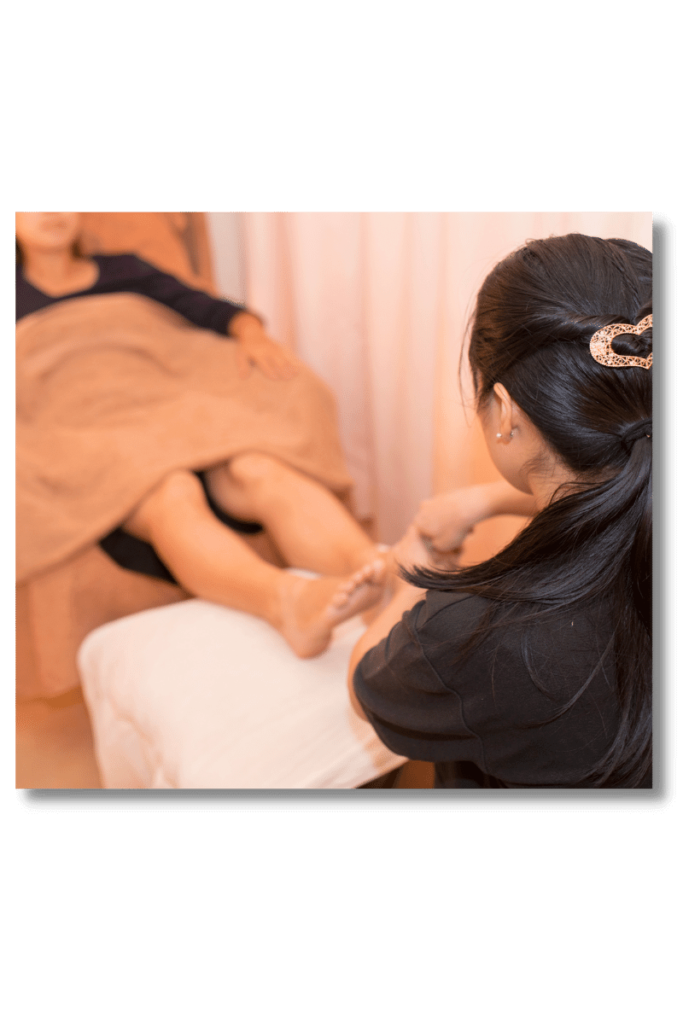
Asian woman doing to put a lock on the hindfoot sub occipital pain

You'll probably see this with a lot of clients that you'll have one foot that's got massive supination and the other one that's not as supinated. 

Now there are a couple of ways we can address that we can have a look to see if it's the midfoot, the cuboid muscle that is cuboid bone, that has been locked up. 

That's because of the torque or the pull between the tibialis anterior and the perennials that share in a common attachment point of the midfoot. 

Their action is to draw up that foot arch, we can have some jointly restrictions going on with the navicular head and the talus bones. It can be either of these structures that creates a problem, let’s assess in this video.

Let me demonstrate how I've achieved amazing results from it.

  • Put a lock on the hindfoot, and then put your hands on the forefoot that is free floating.
  • Move it back and forth to see if we are able to unlock the intercuneiform joints. Occasionally you feel a click from the action or, sometimes, you'll hear the click. This is NOT high velocity thrusts but simply the joint moving over surrounding bones or a nitrogen bubble release.
  • Then move to the second point. Feel if the navicular or talus bones are sitting just a bit more anterior-lateral than normal. 
  • Both thumbs on the bone/s, rock the ankle into some dorsiflexion for about 30 seconds, while they notice any pain and/or stiffness. It can be quite uncomfortable.

2. Sub Occipital Pain Recurring tightness in Upper Cervical Muscles or (suboccipital muscles)

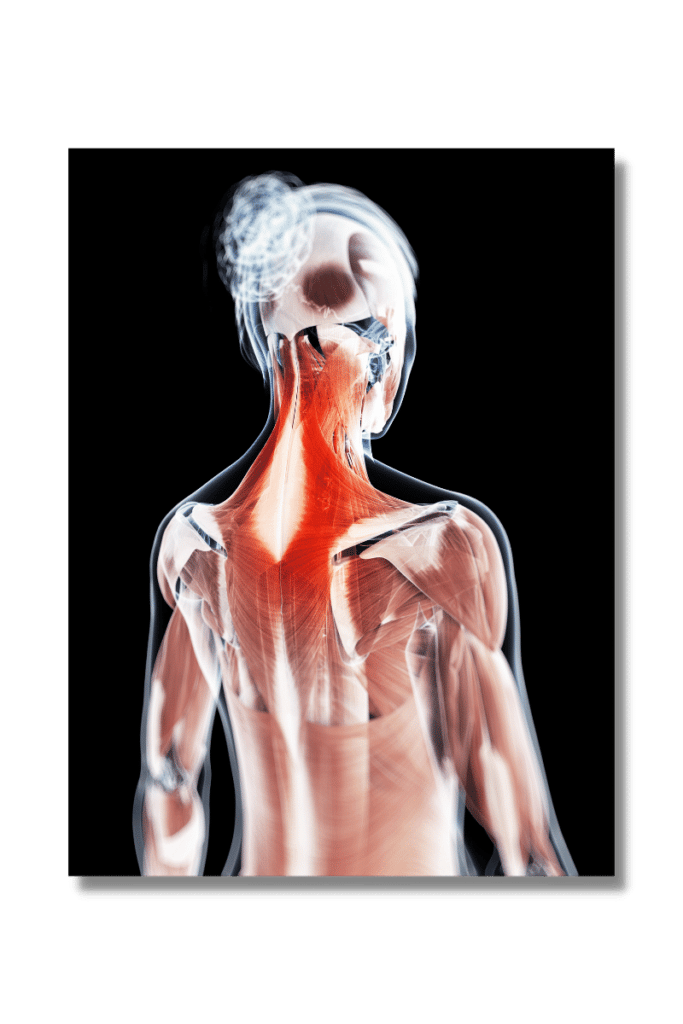
x-ray visual of sub occipital pain of a woman

Are you a practitioner with clients or patients who come to see you who have constant tightness in their lower cervical muscles, specifically the ones that run along the deeper gutter of the neck, and attached to the base of the skull? 

They're referred to as our suboccipital muscles. These are the muscles that our patients often say are very tight. Comments like “It doesn't matter how much I try it doesn't seem to help the tightness”

In the long run, we are able to do lots of work with neuromuscular techniques. 

We can use exercises to increase muscle energy as well as glides, and we can also do joint capsule mobilization, however this is more universal and something I've seen in my clinic that's gained a bit longer duration for both the patient and the client. 

Following the patient's evaluation of the cervical movement.

Let me demonstrate how I've seen amazing results from it.

  • Ask the patient to go through upper cervical ranges. They will chin poke and chin tuck; trickier to do so I ask them to make a double chin. 
  • They will lie in supine, you'll need to feel your hands descending to the table, and your neck feels as if it's lying flat in front of the pillow. 
  • Have them bend their knees and put their feet flat, creating the bridging motion by elevating the buttocks off the table. They are asked to activate the gluteus maximus, which are those massive bionics power drivers to lift the pelvis and hips off the table. 
  • We can experience some beautiful stretches all the way to that thecal area, and coming down the full line of the spine
  • When we get them into a sustained bridge we then increase the pull at the top of this line by adding a pull or drag on the occipital ridge. We are pulling the neck into flexed traction and it works brilliantly for giving extra stretch and length in resting to the back fascial lines of the body.
  • Apply 3 times before you reassess.

3.  Sub Occipital Pain Severe Lateral Cervical Tenderness

Severe Lateral Cervical Tenderness of a man sub occipital pain

I've been seeing clients coming with really restricted neck ranges and quite extreme cervical tenderness on the lateral side. 

It is possible to perform a lot of work on the neck. However, what we really need to do is to discover how we can assist those clients with homework maintenance. 

We also need to assess so we can get a more detailed look at the things taking place that require change. 

This treatment always occurs after conducting an assessment on the client.

Let me demonstrate how I've seen amazing results from it.

  • Check the ranges of movement through flexion, extension, rotation and lateral flexion. Note before and after ranges.
  • We are addressing the deep and superficial arm lines of the anatomy trains. We look at the links between the entire pathway from neck, shoulder, arm, wrist and hand. This is important because a break in the continuity of any of these will make myofascial pain changes to the patient.
  • If there is restriction in the neck, I will move my attention to the hand and to the finger webbing. This may sound odd but I want you to check your necks and webbing and see if you can’t notice a correlation between tenderness and reduced neck movements.
  • Apply a lubricant rather than oil to your fingers. Oil is too slippery and will not give enough grip as you glide proximal to distal between the MCP joints.
  • Make sure that the patient relaxes their arm. Apply your thumb and fingers in the skin just below the MCP joints and then draw them through the webbing between the fingers and off.
  • Go through the web at least three or four times. After that, the same procedure through all the webs to pick up any tightness, tension or bound feelings between each finger knuckle to skin.
  • Do the same process to the other arm. 
  • Once complete, we will retest ROM and if there is a significant result then this will be part of the home care routine.

4. Trigger point therapy

This therapy involves applying pressure on specific muscles or bands within the muscle that create myofascial pain syndromes. 

These muscles seem to react well to triggering whether it be by compression, squeeze/flushing, acupressure or dry needling. 

Can must be used to confirm that it is the muscle you are addressing and not other neural tissue. 

Some patients love it though it can be quite painful during the application.

5. Massage

Massage is one of the most vague definitions in the dictionary for ways to relieve muscle tension. It includes glides, effleurage, kneading and should include techniques including NMT, MET, MFR. 

The old comments like “improve blood circulation” are no longer valid, nor is drinking water post a massage to remove toxins.

Probably the greatest value from receiving a massage is the activation of the parasympathetic nervous system. The body calms to serotonin, dopamine, oxytocin and more feel good chemicals aroused in the body. 

There is true value in this kind of relief, especially with clients under a lot of stress.

6.Stretch 

Stretching is another great way to relieve muscle tension and improve resting tone and active range of motion. There are many different stretching exercises that you can do at home or at work. 

Talk with your remedial therapist or exercise practitioner who will find ones that work best for you and do it regularly throughout the day. 

Remember to breathe deeply while stretching as this will also help relax your muscles.

These manual techniques can be helpful in treating this suboccipital pain and many other types of pain experienced in the body. 

If you’re not sure which techniques are right for you, consult with a qualified massage therapist who can help you choose the best option based on your individual needs.

I have found that these techniques are often very effective in relieving suboccipital pain. 

By applying techniques more distal to the neck can help to release tension in the muscles and tissues around the neck and head. 

This can often provide significant relief from pain and help to improve the range of motion. 

For a better understanding of these techniques please click on the link to the video below.

👇👇

Watch This Video and Subscribe to Learn More!

You tube - https://www.youtube.com/watch?v=Rt-eDY7PLKc

References

National Library of Medicine, BMC Musculoskelet Disord. 2017 Published online 2017 Sep 5.Effectiveness of a specific manual approach to the suboccipital region in patients with chronic mechanical neck pain and rotation deficit in the upper cervical spine: study protocol for a randomized controlled trial https://www.ncbi.nlm.nih.gov/pmc/articles/PMC5584013/

National Library of Medicine, Author Tom George; Prasanna Tadi, Update January 10, 2022. Anatomy, Head and Neck, Suboccipital Muscles https://www.ncbi.nlm.nih.gov/books/NBK567762/

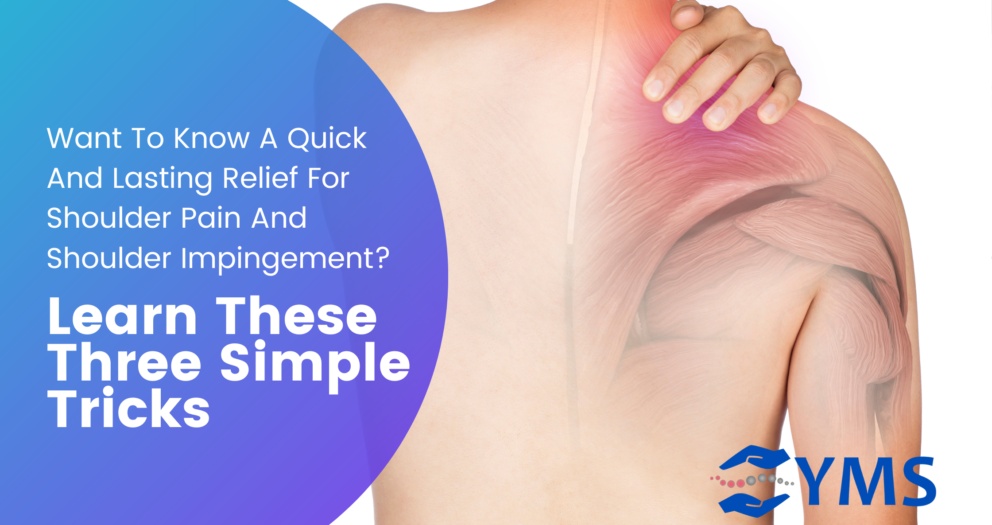
Want To Know A Quick And Lasting Relief For Shoulder Pain And Shoulder Impingement? Learn These Three Simple Tricks

Shoulder pain and shoulder impingement are common problems for many people. They can be a result of an injury or overuse of the shoulder muscles. The pain is usually caused by inflammation in the tissues and joints.

This article will provide some information on how to reduce the pain and symptoms of shoulder impingement.

It includes three simple tricks that can be done at home to help relieve some of the pressure on your shoulders.

Common Causes of Shoulder Pain and Shoulder Impingement

The shoulder is a complex joint and has the greatest range of motion of any joint in the body. 

It is also one of the most mobile joints, which means it is susceptible to more injuries than other joints. 

The shoulder injury comes in many ways, such as by a fall on an outstretched arm, or by repetitive overhead movements.

The causes of shoulder pain and shoulder impingement are varied and depend on the type and severity of the injury.

They include your age, occupation, physical activity level, and genetics. 

Some common causes are:

  • Overuse injury from repetitive overhead motions
  • Muscle strain or sprain from falls onto outstretched arms
  • Bursitis from overuse
  • Rotator cuff tear from falls or contact sports
  • Tendinopathies (Bruised Tendon)
  • Adhesive capsulitis (Frozen shoulder)

Three Simple Tricks for a Quick and Lasting Relief on Shoulder Pains and Shoulder Impingement

Trick #1: Myofascial work with our Sternocleido Joint (SC Joints)

Now your Sternoclavicular Joint (SC Joint) is part of the clavicle. It's also going to be affecting the scapula and how the shoulder sits in that socket space. 

When we have fixations or stickiness in that SC joint, it can actually make a difference to the first rib. 

This can cause a whole band of problems with the neck as well.

We're applying some myofascial glides with our Sternoclavicular Joint.

  • Drop down into the manubrium, the manubrial space and over onto the SC joint, thumb over thumb
  • Compress down onto the SC joint and pushing it carefully
  • Get your client to bend their elbows
  • Have the client do some active movement
  • Depress the SC Joints
  • Draw down and back on that little saddle joint
  • Encourage the SC joint to do its saddle action

At start this can be sticky and tender, but this is also a nice joint mobilisation technique.

Use it on anyone who's exhibiting first rib stiffness, shoulder pathologies or even just when the SC and AC joints feel a little bit stiff and sticky.

Trick #2: Distraction and relaxation with Thera bands

When patients come to see us with aggressive chronic shoulder pathologies, it may be caused by inflamed tendons.

It can come from bursitis, tears and strains.

It can be part of adhesive capsulitis too.

We can do myofascial release techniques, glides and mobilisation techniques.

The gold nugget is what you can ask your patients to do for home care. 

That’s what makes the difference.

Warning - this is contraindicated for patients with unstable or hypermobile joints.

Now, ask your patient to place that Theraband onto his/her shoulder as shown in the image above.

The other underneath the foot on the side of the complaint. 
Let the Thera band sit at the humerus, not on the shoulder joint.

Do the pulling down then up as shown in the video.

Trick #3: Muscle Energy Technique to improve the Shoulders’ Internal & External Rotations

The Muscle Energy Technique is a physical therapy technique used to improve the mobility and function of muscles that are not working properly. 

It is also used to help with pain management and reduce spasms in muscles. 

This technique can be done by a therapist or by the patient themselves.

Let your patient lie down and do the following:

  • Gently abduct the shoulder up to just slight of 90 degrees
  • Let the arm passively externally rotate
  • Then look at the patient’s internal range
  • With 40% effort, ask the patient to push up into his/her arm,while you are holding it still. No movement for 7 to 10 seconds
  • Patient then takes breath in and breathe out
  • As the arm relaxes, don't change our joint angles (post contraction relaxation phase)
  • Do this for about 3x times

These techniques are awesome if you want to improve shoulder mobility and function. 

They are brilliant in helping with pain management and reduce spasms in muscles.

Watch the full video demo of all three techniques here:

https://youtu.be/vFcYRhdj1do

When people think of a solution for shoulder pain, they usually think of going to a doctor and getting prescribed medication. But what if there was an easier way?

The three tricks that we have mentioned in this article can be done anywhere and anytime.

It makes them a perfect solution to shoulder pain relief fast and lasting.

Blog-Banner-Glenohumeral-Treatment-Techniques-for-Shoulder-Pain-and-Problems

Myotherapy: Glenohumeral Joint Pain Treatment

Patients can come in with pain and stiffness from the neck that can refer to and causes elbow wrist and shoulder pain- acromioclavicular (AC) joint and the glenohumeral (GH) joint. Typically, it impedes movements such as lifting of the arms, brushing the teeth, or holding a golf club. It may be described as a moderate pain or a chronic pain that could affect sleep especially if it’s the shoulder you sleep on.

Shoulder Anatomy

You can help them by applying a variety of techniques to relieve uncomfortable pain or sensations in and around that area. But first, let's understand the shoulder anatomy. Since it is one of the most unstable joints in the body with the most movement, it can be complex to understand its structure and functionality.

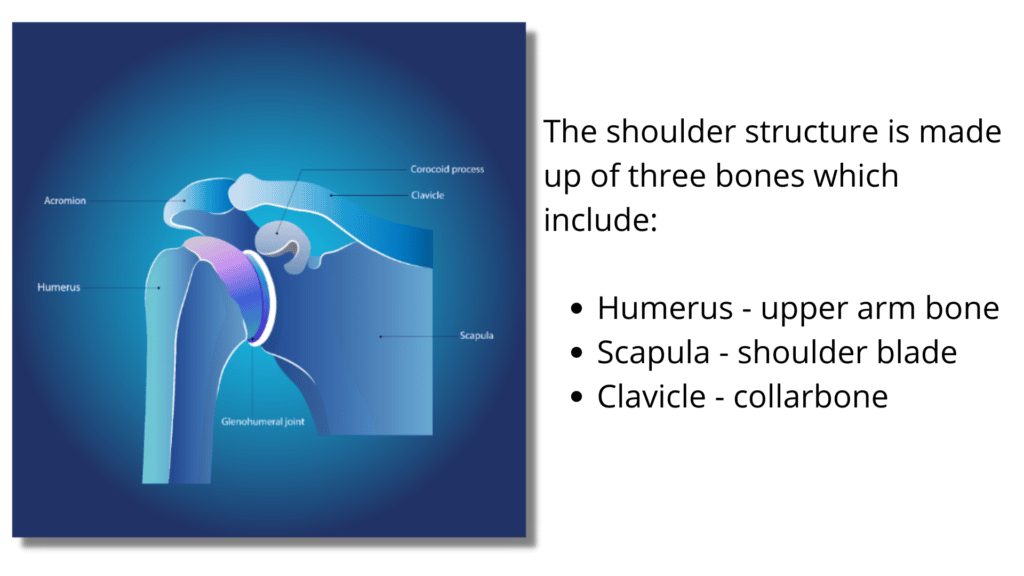
Shoulder Structure and the three kind of bones, glenohumeral joint- Chapmans Reflexes Blog Image

The two shoulder joints that are prone to injury are the acromioclavicular (AC) joint and the glenohumeral (GH) joint. 

  • The acromioclavicular joint is situated where the clavicle is in contact with the acromion and the scapula. 
  • The glenohumeral joint is where the socket of the scapula connects with the rounded head of the humerus. It is responsible for the wide range of motion of the shoulder including flexion, extension, internal and external rotation, adduction and abduction and circumduction. 

There are  eight muscles attached to the bones of the shoulder. They are responsible for the form we see of the shoulder and underarm, they aid in its range of movement, and help protect the GH joint which is the main primary joint involved in function.

The deltoid muscle, which you may also know as the deltoideus muscle, is the shoulder muscle considered to be the largest and responsible for stabilization of the shoulder joint for the prevention of dislocations. 

The other muscles which work with the deltoid for shoulder movement and its functions include:

  • Infraspinatus - for arm raise and lowering
  • Triceps brachii - arm straightening
  • Pectoralis major - connects to the sternum
  • Pectoralis minor - stabilizes the scapula
  • Teres major - arm rotation 
  • Biceps brachii - rotates the forearm; flexes the elbow
  • Latissimus dorsi - helps with arm rotation and movement away from and close to the body
  • Subscapularis - aids to rotate the humerus 
  • Supraspinatus - help to raise arm away from the body

Shoulder Pains and Problems

Muscle Energy Technique

When any of the aforementioned muscles become dysfunctional, inhibited and reduced in their passive resting length, they tend to pull the humerus forward. According to OrthoInfo, shoulder problems that patients can experience fall into these categories:

  • Tendon inflammation - can be bursitis or tendinitis
  • Shoulder Instability - stretched lining of the shoulder joint, labrum, or ligaments 
  • Arthritis - joint tenderness and swelling
  • Fracture - can be caused by trauma or injury from a fall, sports activities, vehicular accident, or a direct hit to the shoulder

Other causes for shoulder pain that are less common include infections, tumors, and nerve related problems.

See Related Video: Shoulder Pathologies: Different Causes and Cool Tubing Treatments

In this article, we are going to focus on glenohumeral joint pain and an amazing muscle energy technique that could improve the humerus’s resting position. This will improve the quality and range of motion and reduce the notable pain felt by your patient. 

Almost any joint in the body can be safely treated with these techniques. Many sportsmen utilize them to avoid future muscle and joint injuries. It's primarily used by people who have restricted range of motion in their neck and back due to facet joint dysfunction found in the neck and back, for those who have broader issues like shoulder pain, sciatica, scoliosis, unsymmetrical legs, hips, or arms, and to treat chronic muscle pain, stiffness, or injury.

See Related Video: BEST exercises for the majority of shoulder problems using the water

Conducting the Assessment

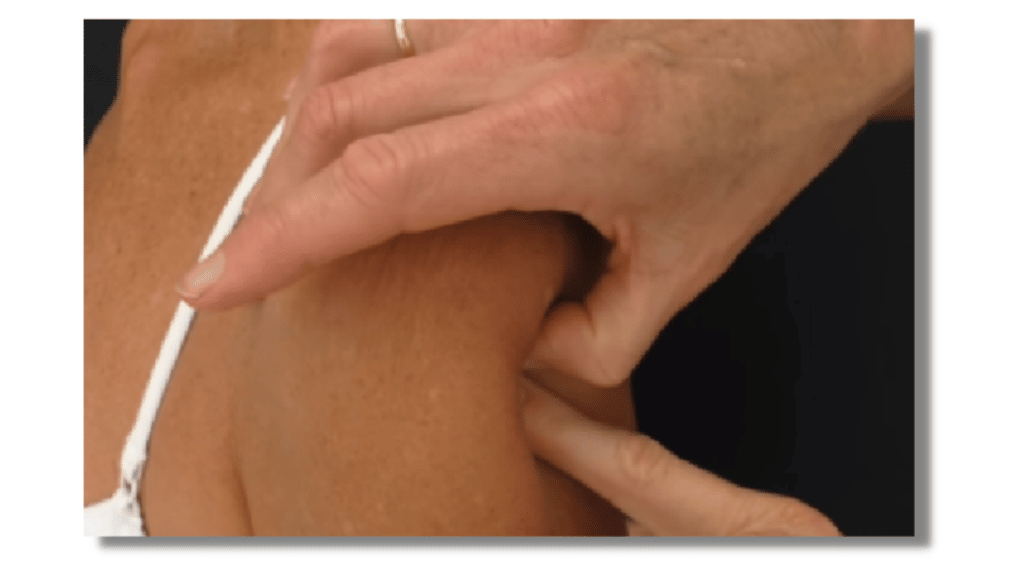
You can clearly see how  far forward the humerus of the patient is. To conduct the test, ask them to be seated comfortably. Stand behind the patient and place your hand over their shoulder. Press your thumb into the tissue, as is in the picture below, until you can palpate the humerus. Note how far forward the humerus is, you can apply a second finger along with your thumb for a more clearer view.

Conducting the assessment for shoulder pain, glenohumeral joint and problems-Chapmans Reflexes Blog Image

Upon confirming that the humerus is anteriorized and checking if any symptoms of pain locally, and/or radiating up in the neck down to the elbow and wrists are present, you can go ahead with this simple muscle energy technique that will improve length of restricted tissue and bring the humerus back into the glenohumeral joint.

Related article: Shoulder Pathologies: Different Causes and Cool Tubing Treatments

Treatment

Let’s begin with the treatment steps. Here’s what you can do:

  1. Have your patient lie on their back (supine).
  2. Put your four fingers behind the humerus while your thumb and wrist sits on top of the humerus.
  3. Slide your thumb down until you get into a firm position.
  4. Push the top end of the humerus down, letting it press onto the table. At the same time, let your other hand elevate the elbow. Continue to do this seesaw-like motion that gently moves the humerus in the capsule a couple of times. Since it can be quite tender, remember not to apply too much force. 
  5. Apply gentle pressure until you can feel the bony end range and ask the patient to push their elbow to the floor and hold it for about 10 seconds. 
  6. Let the patient take a deep breath and when they release their breath you reduce the pressure applied to the limb whilst ensuring that the joint remains in an isometric position. 
  7. Repeat steps four to seven: You apply a rhythmic rocking back and forth motion of the humerus within the joint space for approximately 30 - 45 seconds or until it has a softer feel on the movement, it will start to have a smoother end feel. Continue with the gentle push while the patient takes a deep breath. When they breathe out, stop applying pressure as a counterforce on their humerus. When you apply the muscle energy technique, here are several tips to remember. When pushing down gently, hold it for about 10 seconds and ask the patient to exert 30% to 40% of their effort. Let them take a deep cleansing breath in and when they breathe out, that's when they stop contracting. You can do this three times before reassessing the joint position again. This should make headway into better movement patterns and reduced myofascial pain of the shoulder and surrounding compromised structures.

Watch This Video

Here's a short video where you can see how the steps are carried out. Watch to learn more how to follow through with the muscle energy technique. Try it from your clinic and you will see positive changes in your patients pain and function.

Therapies

Remedial Massage

This treatment manipulates the soft tissues of the body, as well as influences movement to produce a specific therapeutic effect, rather than a generalised approach. It uses relevant techniques, lubricants and movements according to the client’s needs and response.

What can you expect?

  1. A brief history of your complaint
  2. An assessment of how your body moves; standing, seated and laying
  3. Ability to get on and off the table to reassess once or twice in the treatment
  4. Massage, stretches and some active participation
  5. A few suggestions for homework, including stretches

To feel alert, awake and energized after the treatment.

30 Minutes

AU$110 /session *
History of your complaint and its assessment. Assessment on how your body moves; standing, seating and laying. Massage stretched with active participation. Suggestions for you to practise at home.

45 Minutes

AU$143 /session *
History of your complaint and its assessment. Assessment on how your body moves; standing, seating and laying. Massage stretched with active participation. Suggestions for you to practise at home.

60 Minutes

AU$165 /session *
History of your complaint and its assessment. Assessment on how your body moves; standing, seating and laying. Massage stretched with active participation. Suggestions for you to practise at home.

Musculoskeletal Therapy

This therapy has been designed to treat the muscles and skeletal system using various soft tissue and mobilisation (not manipulation) techniques. Used in the treatment and rehabilitation of back pain, neck pain, joint pain, muscular dysfunction and/or injuries, musculoskeletal techniques incorporate a varied amount of ‘hands on’ remedial and mobilisation techniques, as well as take-home stretching and strengthening exercises. This assists in maintaining functional alignment of the skeletal system.

What can you expect?

  1. A detailed history of your complaint
  2. A structured assessment of how your body moves; standing, seated and laying
  3. Special orthopaedic tests
  4. Nerve conduction assessments valuable to understanding your weakness
  5. Muscle firing sequencing so we can return them to normal function
  6. Fully clothed treatment (make sure you wear something appropriate)
  7. Strength testing, joint mobilising, muscle energy techniques, myofascial techniques, some massage manoeuvres, stretches, and some deep muscle trigger point work
  8. A simple and structured effective home exercise plan

To reduce pain, improve function and start feeling normal again.

30 Minutes

AU$110 /session *
History of your complaint and its assessment. Special orthopaedic tests with a structured assessment of your body. Nerve conduction assessments valuable to understanding your weakness. Muscle firing sequencing so we can return them to normal function.

45 Minutes

AU$143 /session *
History of your complaint and its assessment. Special orthopaedic tests with a structured assessment of your body. Nerve conduction assessments valuable to understanding your weakness. Muscle firing sequencing so we can return them to normal function.

60 Minutes

AU$165 /session *
History of your complaint and its assessment. Special orthopaedic tests with a structured assessment of your body. Nerve conduction assessments valuable to understanding your weakness. Muscle firing sequencing so we can return them to normal function.

90 Minutes

AU$220 /session *
History of your complaint and its assessment. Special orthopaedic tests with a structured assessment of your body. Nerve conduction assessments valuable to understanding your weakness. Muscle firing sequencing so we can return them to normal function. Advanced consultation.

Kid’s Massage

A complementary and alternative treatment that uses massage therapy, or 'the manual manipulation of soft tissue intended to promote health and well-being' for children and adolescents. We also focus on sports performance with neurolymphatic points and stretching, which are gentler if painful treatment is a deterrent.

What can you expect?

  1. A brief history of your child’s complaint
  2. An assessment of how they move specifically with their sport or activity
  3. A treatment protocol matching any sporting event or fixture
  4. Clothed treatment for personal comfort
  5. Massage, stretches and some active participation
  6. Some specific suggestions for home exercises or stretches to improve movement

To feel stronger, more flexible and energetic after the treatment.

30 Minutes

AU$88 /session *
History of your child's complaint and its assessment. An assessment of how they move specifically within their sport or activity. A treatment protocol to match any sporting event or fixture. Massage, stretches and some active participation. Specific suggestions for home exercises.

45 Minutes

AU$111.50 /session *
History of your child's complaint and its assessment. An assessment of how they move specifically within their sport or activity. A treatment protocol to match any sporting event or fixture. Massage, stretches and some active participation. Specific suggestions for home exercises.

60 Minutes

AU$132 /session *
History of your child's complaint and its assessment. An assessment of how they move specifically within their sport or activity. A treatment protocol to match any sporting event or fixture. Massage, stretches and some active participation. Specific suggestions for home exercises.

Pregnancy Massage

The three stages of pregnancy have particular and unique characteristics that the therapist must deal with in a particular manner. The first trimester can bring on extreme hormone fluxes, with nausea as the main side effect. Certain body points are avoided throughout the journey to childbirth as they may stimulate potentially uncomfortable side effects. The therapist should be well versed in each stage of your pregnancy, as well as the clinical picture you present with.

The results from a good treatment include relief from

  1. Altered body alignment
  2. Unstable lower back and hips
  3. Nerve pain and pinching around the sacrum
  4. Sciatica and lower back pain
  5. Pain between the shoulder blades
  6. Spasms and cramping
  7. Sleep issues and headaches

Why should you add massage into your pregnancy?

Your 9-10-month pregnancy is uniquely different from woman to woman. No two sisters have the same biological and hormonal experiences, and the life that grows within imparts its own special gift of biomechanical stressors. The therapist you choose should be someone that you trust, is highly experienced, and wants to share in your journey.
Massage has validity as a way to cope with the aches, pains and tension your body experiences. We can be part of the process and look after your body’s needs.

Visit Paula's Clinic for remedial treatments

Book your appointment for any of Paula’s remedial massages at her clinic.

Book your appointment

All prices are inclusive of GST.

TOP MASSAGE THERAPIST REVEALS!

Easy Steps To A Bulletproof Practice

Join Paula’s tribe to receive AMAZING deals in courses and learn heaps of COOL shiz!

woman holding her left shoulder pain

Shoulder Injury, Neurolymphatic Point Stimulation Case Study

Clinical features

This is a shoulder injury and neurolymphatic point stimulation case study.  A 44-year-old healthy female came to me presenting a 5 ½ months-post fall that caused a fracture to her greater tubercle and dislocated the humerus posteriorly.

Intervention and Outcomes Before using Chapmans Reflexes

A variety of interventions were performed by her physiotherapist before commencing treatment with me and the application of Chapmans reflexes. Non-surgical relocation of the humerus was performed by her surgeon followed up with weekly rehabilitation therapy with physiotherapy using closed chain small exercises. To date, she has a humeral elevation close to 80 degrees. She was also seeing her regular chiropractor, Dr. Sandy [10 years +]. She has included acupuncture to try for more movement in the shoulder complex. Dr. Sandy referred her to me to address the still limited range of motion.

Interventions using Chapmans Reflexes and Various NMT

For the interventions using Chapmans reflexes, one treatment was applied per week for three weeks. Then one more 14 days later with follow-up in so that she could return to full ROM and strength. This also enables her to perform push-ups from a toe stance. The pain was significantly reduced to VAS less than 1/10. I also addressed her underlying chronic lower back pain complaint.

METHODS

INITIAL PRESENTATION

Mrs. W showed:
  1. tension/hypertonicity
  2. tight left lateral neck and shoulder
  3. some altered sensation
  4. numbness over the region of the lateral humerus. Her description of the region included "feels like a block" and
  5. "has a heaviness when trying to reach overhead".
Over the last 10 weeks, she stated that the medial and anterior deltoid muscle "now finally getting the tone and feels like it is activating". She had actively been doing her home care as instructed by the physiotherapist assigned to her. The home care included the use of heat packs to alleviate the tight and tense soft tissue.

Assessment

Her levels of stress were reported were extremely high. She stated that she felt like she was holding everything internally. She was unable to take full diaphragmatic breaths and her thoracic range of movement was limited in all ranges. Strength testing was performed and showed moderate weakness on the diaphragm-supraspinatus isometric test. There is also a moderate weakness to the latissimus dorsi, the thoracic extensors, posterior deltoid/shoulder complex, and the external humeral rotators.

Treatments

Treatments for Mrs. W included the following:
  1. Chapmans Reflexes – Commenced by stimulation of the neurolymphatic points feeding the diaphragm and then teaching her diaphragmatic breathing to elicit the “relaxation response” and trigger the parasympathetic nervous system. Chapmans Reflexes were applied to the neurolymphatic points for the latissimus dorsi anterior and posterior points and the Tx and shoulder extensors, where I followed the protocol of vigorous but not deep rubbing for 30 seconds in each region. Once these areas were stimulated her strength had improved to very strong isometric holds of the shoulder muscles and increased ROM of humeral extension and internal adduction.
  2. Muscle Energy Technique - Following the neurolymphatic stimulation, I added a muscle energy technique to the humeral internal rotators. This will allow greater resting length in these muscles and increase mobility and ROM of humeral external rotation. During the post isometric relaxation phase, the resting length of the muscle will be greater. This technique has been found to effectively reduce capsular restrictions noted at the glenohumeral joint through ROM.
  3. Low load muscle activation - She then performed a low load muscle activation of the subscapularis in its closed position. The action of the subscapularis is internal humeral rotation as well as adduction of the humerus. This allows the target muscle to contract independently from the other muscles used in the action of the primary muscle.
  4. Neuromuscular techniques - Various neuromuscular techniques including glides and gentle cross fiber movements to the biceps, pec minor, posterior deltoid, and the fascial line between the triceps in supine were applied. Seated active movements of the head and neck in rotation to the left upper and mid trapezius and thoracic erector spinae, prone to the left latissimus dorsi, around the scapula, rotator cuff, and levator scapula were also applied. Mobilization of the bilateral Cx joints to address the left-sided stiffness. Both sides were painful but became less painful after 3 applications on each side.
  5. Homecare - This included activating the neurolymphatic points of the diaphragm, 10 diaphragmatic breathing, and breathing full breaths often through the day.
Mrs. W had plenty of resentment issues over the fall and the lack of support with those around her during the incident. So, we also discussed ways for her to do self-anger management and let anger become less of an impediment to her treatment progress.

2ND TREATMENT

Mrs. W did her homework using the breathing exercises to manage her stress and chest restrictions. She also wrote her resentment issues down on butcher paper and stated that she was “feeling like moving forward a bit more”. Her shoulder’s range had improved but still with pain and some mild swelling for a few days post-treatment. She attempted to do toe push-ups (did 3 this morning) which she had been unable to do.

Assessment

There were still some weaknesses with thoracic and humeral extensors and latissimus dorsi. Also, there was still weakness in recruiting the neck muscles to assist in the strength testing with a note to actively retracting the jaw in every movement. Strength testing also included weakness in neck flexion so the neurolymphatic point for the region was included. Assessment of supine rotations of the lower limbs to assess the balance of the soft tissues of the trunk lateral flexors, obliques, and deep lumbar rotatores, multifidi, and intertraversii muscles were done. Looking at the Anatomy trains and links to the functional backline, lateral line and spiral line with the connections from the shoulder and pelvis have led me to include lumbar muscle energy techniques to address rotations or torsions of the sacrum and/or ilia.

Treatments

  1. Chapmans Reflexes - These were applied to the left latissimus dorsi, thoracic flexors/humeral extensors, and sternocleidomastoid/deep neck flexors. Re-assessment of strength was markedly improved with almost complete full range of shoulder abduction.
 
  1. Local cross-fiber friction and neuromuscular techniques - These were applied to the upper anterior humerus/anterior deltoid tendon, subclavius, 2nd/3rd ribs at the sternalis region - using forced inspiration and expiration; myofascial ringing of my hands across the lateral humerus/ interosseous membrane just inferior to the deltoids with active humeral rotation, compression/stripping into the thenar muscle. These techniques were chosen to include the fascial arm lines of the Anatomy Trains. Studies show that restrictions along these superficial and/or deep arm lines will alter the biomechanical efficiency of the shoulder complex and cervical ROM. Lumbar muscle energy technique and gluteal stretches were included in this treatment. [Shoulder Injury & Neurolymphatic Point Stimulation - A Case Study]
 
  1. Homecare – A 30-second stimulation of the neurolymphatic points of the latissimus dorsi, thoracic flexors/humeral extensors, deep neck flexors/SCM, and diaphragm were prescribed including 2 minutes of diaphragmatic breathing. I started Mrs. W on the functional stabilizing activity of wall springing push-ups x 20 daily. This reduces the load of the shoulder complex and still offers eccentric and concentric contractions to any of the muscles with attachments to the scapula, humerus, or ribs.
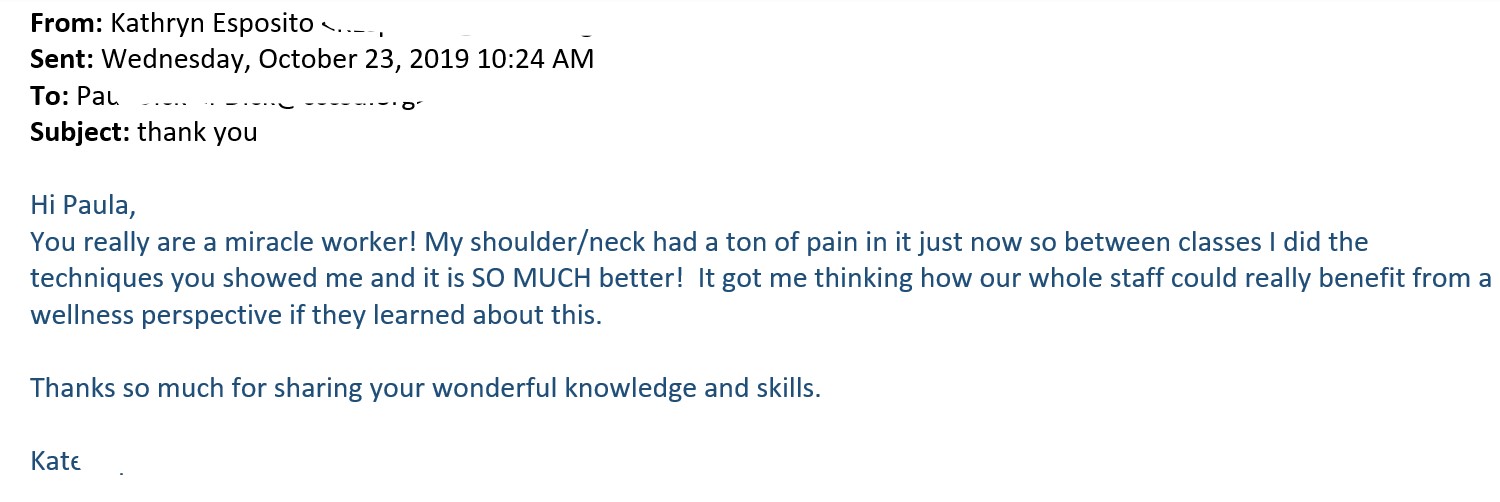
 

3RD TREATMENT

Mrs. W had been doing the Chapmans activations each day. She has full pain free range of the humerus in all ranges, has been doing wall springing push-ups and today performed 15 toes push-ups for her physician. He has commented that her post-non-surgical relocation recovery has accelerated far greater than usual progressions. He is very happy with her outcomes.

Assessment

The latissimus attachment pain is finally settled and latissimus strength is 100%. Shoulder ROM was considered to be full range in all planes, though a painful taut band was noted on the left teres major. We are now focusing on an ongoing episodic complaint of lower back pain which is 6-7/10 on the VAS scale and can flare up with long hours standing at work. Strength testing showed the weakness of the left lateral sling including lateral trunk flexors, gluteus medius/minimus; weak right gluteus maximus, right hip flexor iliopsoas, right superficial front and back fascial lines with weakness in strength testing of the quadriceps, gastrocnemius, and tibialis anterior.

Treatments

  1. Neurolymphatic points stimulation  - This was applied to the weakened muscles tested listed above. Neurolymphatic points relevant to musculoskeletal dysfunction are found primarily on the anterior of the body, when there is chronic weakness/stress we also need to treat the associated posterior Chapmans Reflex points housed near the erector spinae of the relevant spinal nerves.
  2. Low load activation - I added low load muscle activation to the left rhomboid to increase the stability of the left rotator cuff of the scapula which affects the spiral line of the anatomy trains.
  3. Prone various neuromuscular techniques - These techniques were applied to the gluteus maximus, minimus, and medius, adding compressive mobilizing techniques to the sacral ILA, sacrotuberous and iliolumbar ligaments, complimenting with myofascial release/passive internal rotations of the deep hip rotators, also applied XFF to the tendon of the right quadriceps in supine with Mrs. W adding active femoral rotations.
  4. Homecare – Mrs. W continued to apply her 30 seconds of vigorous but not hard rubbing to the neurolymphatic points associated with the latissimus dorsi, thoracic flexors/humeral extensors, deep neck flexors/SCM, diaphragm and continue her diaphragmatic breathing each morning and if she felt she was going into a stress state. She will also include the low load muscle activation of the rhomboid muscle to address any dysfunction of the spiral line of the anatomy train.
 

4TH TREATMENT

Mrs. W booked in 2 weeks later – she had increased her University assignment load and she works full time as a registered nurse which added more stress to the shoulder and back. One episode of neuralgia from the right side of the neck resulted in a silent migraine occurred with excessive hours in front of the computer. Her shoulders were still maintaining full range of motion but last week, a feeling like a band or pressure developed across the posterior deltoid and over the shoulder which is still present today. No complaints of lower back pain since the last treatment.

Assessment

Full strength when testing the shoulder muscles which was encouraging. There was also a full range of movement though a feeling of the band over the deltoid still present. The taut band and pain commonly referred to as a "Trigger Point" was no longer present on palpation of the teres major. Lumbar rotations in supine were equal and full range. Sacral hypertonicity and painful areas were no longer a concern.

Treatments

  1. Local neuromuscular treatment - This was applied to the left shoulder commencing with positional release techniques to the external rotators of the humerus, glides to the pectoralis minor and major.
  2. Prone neuromuscular techniques - These techniques were also applied to the full-back, latissimus dorsi, lumbosacral and thoracolumbar fascia, shoulder rotator cuff, upper trapezius, and levator scapulae.
  3. Homecare - Activation of the Chapmans Reflexes three times a week and increase to daily if the range reduced in any of the humeral movements were advised. She would continue with the low load muscle activation of the rhomboid before stronger shoulder exercises. She would have to find strategies to add small breaks into the assignment writing tasks so that long hours working at the computer are broken up.

LAST TREATMENT

Two weeks further to follow up and all ranges are full, pain-free, and feel easy throughout the entire range. I added a bike exercise to help with stress management. She would continue with the low load muscle activation and Chapmans Reflexes point stimulation.

Treatments

  1. Therapeutic management - She asked to have a more relaxed treatment so I removed any neurolymphatic point stimulation or exercises to the treatment protocol and gave a general treatment including glides, effleurage, petrissage, myofascial release techniques, positional release techniques, some active and passive stretches.
  2. Homecare - She would continue with the physiotherapist's exercise routine adding the low load and neurolymphatic point stimulation before these rehabilitation activities.
I followed up 6 and 12 months later and Mrs. W had no further need to intervene on her shoulder.    

Chapmans Reflexes Online Courses

This new accredited MODALITY is now offered online AND here for you NOW.

Chapmans Reflexes Silver Course

$217.90 (inc GST)
(0 Reviews)

Chapmans Reflexes Gold Course

$434.50 (inc GST)
(2 Reviews)

Chapmans Reflexes Platinum Course

$654.50 (inc GST)
(1 Review)
  • Platinum

    • 6 Module Online Course
    • Module Videos, Audio and Quizzes
    • Email support for LIFE!
    • Your own Private Facebook Group with individual Zoom links quarterly
    • Certificate of Accreditation
    • Poster Soft Copy
    • Physical Assessment Assistance
    • Video Demonstration Assistance
    • Continued Education Points
    • Top Listing in your Unique Therapists Directory
    • Chapmans Manual Audio Book
    • One-On-One Assistance
    • Early access to Research
    • Opportunity to involve with case studies, clinical trials
    • FREE ticket to one hands-on 2-day workshop
  • Gold

    • 6 Module Online Course
    • Module Videos, Audio and Quizzes
    • Email support with Greater Access than the Silver option
    • Your own Private Facebook Group with links to New Clinical Work
    • Certificate of Accreditation
    • Poster Soft Copy
    • Physical Assessment Assistance
    • Video Demonstration Assistance
    • Continued Education Points
    • Unique Therapists Directory to Promote  your Clinic
    • Chapmans Manual Audio Book
    • One-On-One Assistance
    • Early access to Research
    • Opportunity to involve with case studies, clinical trials
    • FREE ticket to one hands-on 2-day workshop
  • Silver

    • 6 Module Online Course
    • Module videos, audio and quizzes
    • Email support at the touch of a finger
    • Your own Private Facebook Group
    • Certificate of Accreditation
    • Poster Soft Copy
    • Physical assessments
    • Video demonstrations
    • Continued Education Points
    • Therapists Directory
    • Chapmans Manual Audio Book
    • One-On-One Assistance
    • Early access to Research
    • Opportunity to involve with case studies, clinical trials
    • FREE ticket to one hands-on 2-day workshop
medal outline clipart

Master Syndromes

consultation outline clipart

24 Hour Assistance

time out outline clipart

No Rush to Complete

The majority of therapists nail these courses over six months, but extensions are available.

They then become so uniquely brilliant at addressing muscle pain, joint stiffness and referral patterns that they turn into the therapist people travel miles to see.

Learning the hidden gems in this online program will show you how to

  • identify when stress is the primary cause of the problem
  • identify what specific tests should be done and which ones are a USELESS waste of your valuable time
  • Apply techniques that have been researched and tested to make the BIGGEST changes to pain, weakness and stability
  • Be gifted with small, powerful instructions for you and your client/patient to use, that neither of you will EVER forget!
  • You participate in the course by reading, playing, watching videos and listening to audio content.
  • We check your progress to make sure you are AWESOME before you move on, with easy to apply open-book quizzes.
  • If you need CEC's - select Gold or Platinum; that means I spend more time with you at ZERO added costs.

Our Silver level is for those doubtful Thomas's and "non commitment" types of therapists. You get the notes and quizzes + poster but if you don't put out with assessments, you don't get the Pot Of Gold at the end of the rainbow;

Gold and Platinum levels receive the full package PLUS added to the YMS website “Therapist Directory” to show your expertise and get recognized for your efforts. People in pain searching for help WILL find you and can connect with you here.

The Platinum level offers one FREE face-to-face weekend course or the 5 Module VIRTUAL Course as part of the package. You get early access to research developments on the Chapmans Reflexes modality, as well as the opportunity to get involved with case studies and clinical trials.

All levels will gain access to the dedicated Facebook support group and receive the Chapmans Reflexes downloadable poster and Certificate that you can parade on your clinic walls.

What changes are you likely to see?

The GLUTES are your power drivers for the hips into extension.

Truth - they can become amnesic and change how the lower back and connections to the lower limbs are affected.

Truth - crappy glutes WILL eventually create back pain with referral patterns.

Truth - the work you'll learn 100% of the time improves the strength of the gluteals AND reduces the pain syndromes associated with the weakness.

Fact - stimulating the neurolymphatic reflex arcs in the body make MASSIVE positive changes each and every session.

Is this course right for me?

Heads up Remedial massage therapists, Myotherapists, Osteopaths, Sports Physiotherapists, Pilates instructors, Exercise Physiologists and anyone wanting a MASSIVE injection of RESULTS at the SOURCE.

Stop bashing your heads against a brick wall.

Seriously STOP!!

Use this unique though age-long way to discover the primary muscles and fascial trains originating the dysfunction.

Get REAL results and not weak vanilla treatments that have the pain creep back into your client/patient.

Originated by Osteopath Frank Chapman, modulated by George Goodheart and now taking into the areas of muscle imbalance from anxiety and stress.

We see changes to each crippled defensive body that STAY strong.

You can too!

photo of wendy together with me smiling

Have patients/clients want to follow you for life!

If I got a nickel for every patient that said "I will follow you to the end of the Earth" I'd be a rich woman.

You have an opportunity to have this happen to you.

Even after the 1st Module, you'll see RAPID POSITIVE effects in pain management.

Clients referring friends and family almost overnight suddenly become your greatest marketing resource.

Just brilliant!!

You've found the Genie in the Bottle!

Finally something that integrates into what you are doing now.

Has a global approach working with the fascial trains as a guide, neurolymphatic reflexes (sounds a lot but it's where we are heading folks!) and a simple combination of stimulating reflexes or applying NMT manoeuvers to create strong, healthy, buoyant muscles, joints and fascia.

All the while still blending in your own signature techniques that you know and love.

genie lamp with smoke

Enroll in the Chapmans Reflexes Online Course below

Chapmans Reflexes Silver Course

$217.90 (inc GST)
(0 Reviews)

Chapmans Reflexes Gold Course

$434.50 (inc GST)
(2 Reviews)

Chapmans Reflexes Platinum Course

$654.50 (inc GST)
(1 Review)

Who The Hell Is Paula Nutting Anyway?

A qualified nurse, personal trainer and specialist in remedial massage and musculoskeletal therapy for over 30 years, Paula Nutting – Your Musculoskeletal Specialist (YMS) – brings the success of her established hands-on Chapmans Reflexes workshop to the online arena in the form of a state-of-the-art online program that all therapists can benefit from, regardless of their location.

Paula explains: “Therapists can improve their client/patient outcomes, at the same time lessening the excessive workload that comes with heavy bodywork. The course is all about how to work smarter, not harder, and teaches how to stand apart from competitors.”

“Therapists can enjoy the flexibility to complete the training in the privacy of their own homes at a pace that suits them, saving travel time and money. The premium course also offers ongoing support and feedback options.”

Paula Nutting, your musculoskeletal specialist, online course thumbnail

So What Do I Get For My $$$

headphones outline clipart

Listening might be your thing.

Can't stand reading? Many people just hate it but LOVE listening to learn. We have set that up in each Module.
DNA biology clipart

History & Methodology

This is the how and why of the actual neurolymphatic point activation. How it has developed and become SO dramatic.
video conference outline clipart

Links to Professionals

Feel comfortable to ask questions straight away, whether anatomy or application, where here 24/7.
medal outline clipart

CECs & Certificate

Get valuable CEC's and Certificate of Accreditation when you finish the ONLINE Gold or Platinum courses. Sorry peeps - no CECs for Silver.
brain outline clipart

Stress Cycle & Hormone

What the big deal about stress is anyway! How to stop the body from making destructive hormones and start to relax and repair (includes video and audio practicum).
stretching outline clipart

Lines of Pull

It’s all about fascia and lymph and nerves. We assess a way no-one else does to get results no one else will. Learn why movement using postural or phasic muscles makes a massive influence of pain.
microbiology lab outline clip art

Detailed Analysis

Breaking down each region in more detail, what groups of muscles work together to provide control and stability. These include the diaphragm and core, many of Myers anatomy trains, the pelvic girdle and connections to lower limbs, scapula mobility and thoracic mobility with upper limb influence and head & neck.
strength outline clipart

Strength Tests

Yes Massage Therapists can apply strength tests and this is easy to do when you know what we are looking for. Activate the points for the each regions, read and see how easy it is to do with the written and video demonstrations.

Assessment

You’ll be required to complete a series of mini-quizzes, including true or false and multi-choice questions, on completion of each module. If you choose the Gold or Platinum levels you will also be required to upload a video demonstrating each technique competently and say a few words about the process, what you and your client felt. I will offer positive feedback and help you with each assessment so that you truly master becoming a Supercharged Therapist with Chapmans Reflex Points.

On completion of the program

Past students have life access to the Chapmans Reflexes Private FB Group where we update new research content, case studies or revise the techniques. We include Webinars to jog the memory and keep you motivated.

You get your own FREE listing on our Website Therapist Directory where you can add and update your details to market that you're out there.

Be AMAZING and EXCITED to know that you will be someone that clients and patients seek for your wisdom and treatment outcomes.

JOIN ME TODAY!

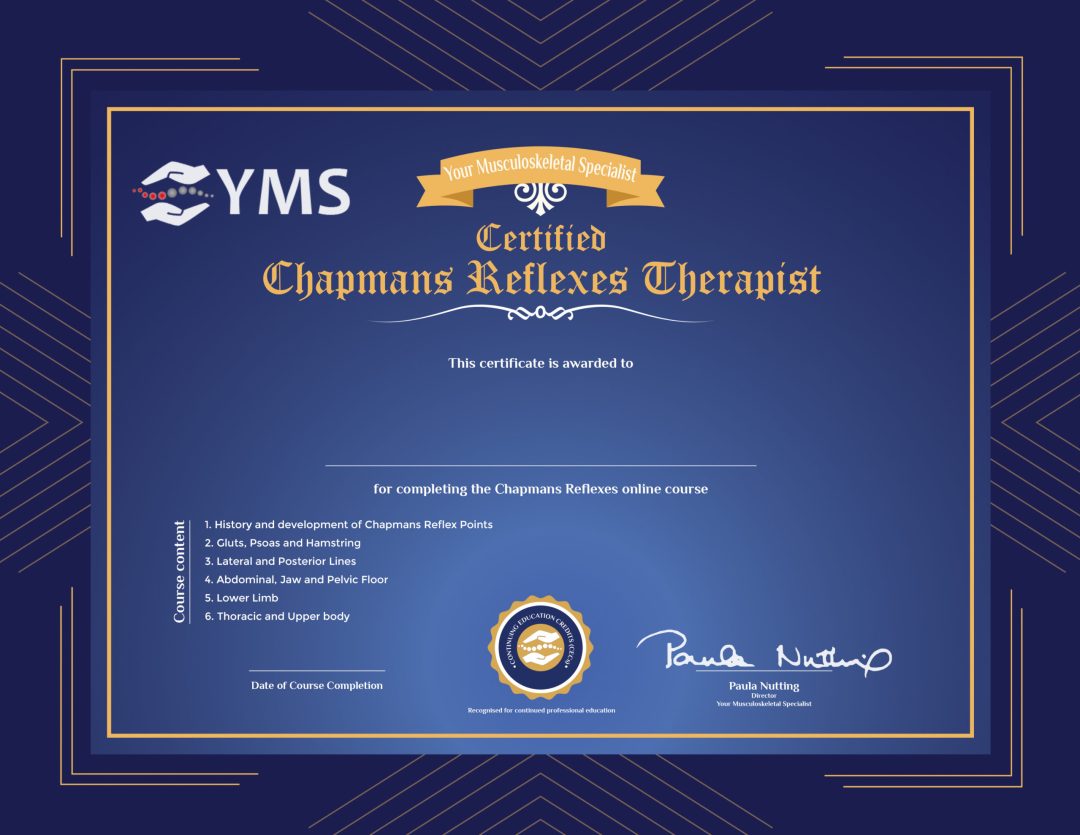
The Certificate

A sneak-peak into the certificate

Your musculoskeletal specialist certificate with CEC

icon What others have to say about this AMAZING technique.

Paula Nutting – I’ve seen some of your class videos and your teaching approaches are unsurpassed in excellence. I would recommend them to anyone.
Dr Michael Koplan
Rated 5 out of 5
It was still by far and away from the best course I have been to, and I have already incorporated it into quite a few treatments with great results already.
Jared
Rated 5 out of 5
We have been researching the Chapmans Reflex Points and using them for a number of months with our patients. We have been very excited by the results our patients have been having with improved diaphragmatic breathing, muscle activation, and decreased
Sabrina Royster
Rated 4.5 out of 5
What a weekend we have just had! I got straight into it Monday and Tuesday – have to say clients have been very pleased with great results and even I was impressed. Here are my share stories: Client 1: Complex medical history
Nicky S
Rated 5 out of 5
I have been so interested in Chapman’s reflexes and was thrilled that I could purchase them. I have tried some of the moves with great results. I only have a small practice as I’m semi-retired and this manual is going
Linda Palmer
Rated 5 out of 5
It was a great weekend and I learnt heaps and my body feels more grounded and flexible in my yoga practice now. I will continue to work on my own body and through that will see ways of integrating it
Cheryl Williams
Rated 5 out of 5

Chapmans Reflexes Silver Course

$217.90 (inc GST)
(0 Reviews)

Chapmans Reflexes Gold Course

$434.50 (inc GST)
(2 Reviews)

Chapmans Reflexes Platinum Course

$654.50 (inc GST)
(1 Review)

THIS SHIZ IS SO GOOD I'LL 100% GUARANTEE IT! OR YOUR MONEY BACK!

satisfaction guaranteed clipart

You Do The Course With A MONEY BACK Guarantee – 100% RISK-FREE

Complete the Gold or Platinum online courses. If you don’t LOVE the results, I insist that you get 100% of your money back.

Let me tell you exactly why I offer this unbeatable guarantee.

When I developed the Chapmans Reflexes technique in my practice, I had used so many other techniques and found some excellent, some great, some average and a few with hit and miss results. My patients and clients would get anywhere between hours-to-weeks’ relief from my work, and I had to find something with more consistent outcomes.

That wasn’t good enough for me and nor should it be for you and your clients/patients.

That’s why I developed something that I knew would give some structure to how the body responded to stress, how we could increase strength and how we could reduce pain. I have been running “The Supercharged Therapist Method” TM course, face-to-face, for over ten years, over one- and two-day formats. Those attending include therapists in massage, personal training, myotherapy, chiropractic, osteopathy, occupational therapy, Pilates, physiotherapy, and sports sciences.

Experienced practitioners and newly accredited students find it amazing and rewarding.

I know the treatment technique works. I am offering the course ONLINE so that more people can have the opportunity to benefit from it as I have. I care about developing super high-quality content, full of easy-to-read material, videos, quizzes, forums and ask me questions that you won’t find anywhere else.

Chapmans Reflexes therapists are using the technique within their current treatment protocol with ease, and their patients/clients are remarking on how the results are so dramatic. I have used this treatment protocol for over ten years, on more than 80 people per month. I have no end of referrals from patients and other practitioners in their quest for positive outcomes in health.

And that’s why I guarantee “The Supercharged Therapist Method”™ online course.

It’s simple: Take the course and see for yourself. If you don’t see the results, I’d like you to email me, show that you did the work and I’ll refund you 100%.

This guarantee is extended for a full 180 days, completely covering all six modules in the program.

Try the ENTIRE course. If you can’t see and feel the difference between the weak-versus-strength of the muscles, email me at ANY TIME during the course. Show me your test and treatment, and why you feel you’re not getting positive results. I’ll refund 100% of your course fee. You can even keep the bonus Chapmans Reflexes poster you downloaded – at my expense.

By the way, I ask you to show me you’re doing the tests and treatment because I know how powerful they are when applied. I have no intention of keeping your money if you’re dissatisfied, but I insist that you show me, just in case your results are related to an incorrect application. I want you and your clients/patients to be able to feel the difference in their pain, mobility and stress.

Yours sincerely,

Paula Nutting.

Frequently Asked Questions

How does online education work with Chapmans Reflexes?

We use a learning management system (LMS) to deliver all the currently taught content, course requirements, video instructions and materials. At each step of the way, there is the opportunity for you to use the message board (Chapmans Chatter) to discuss topics, watch the video demonstrations of each assessment, strength test and neurolymphatic stimulation technique, and complete the quizzes attached to each module.

You will also be able to (and required to if doing levels II or III) upload your own assessments and treatments of the individual tests. These will be watched, assessed and fed back on by Paula Nutting personally. If there is a need to correct anything, Paula will interact with you personally via this enhanced learning platform. Paula will also monitor student progress, assess comprehension, and accept student work as part of the Chapmans Reflexes online structure.

Is learning Chapmans Reflexes online as effective as face-to-face instruction?

Learning the technique via online education will not be as kinaesthetic as the face-to-face model. However, the use of the course video instruction, as well as the assessable video content, the capacity to have the hands-on component is effectively dealt with.

Online education may seem relatively new, but years of research suggest that it can be just as effective as traditional coursework and often, more so. According to a U.S. Department of Education analysis of more than 1,000 learning studies, online students tend to outperform classroom-based students across most disciplines and demographics.

Another major review published the same year found that online students had the advantage 70 per cent of the time, a gap that authors projected would only widen as programs and technologies evolve.

While these reports list several plausible reasons as to why students might learn more effectively online – perhaps they have more control over their studies or more opportunities for reflection – the medium is only one of many factors that influences outcomes. Successful online students tend to be organized self-starters who can complete their work without resorting to a traditional classroom.

Do you get the same support as the Chapmans Reflexes face-to-face workshop?

Yes, we will try our best to support you in each and every way possible to make your experience the best.

What technical skills do I need to do the Chapmans Reflexes online?

This online Chapmans Reflexes learning platform is designed to be as user-friendly as possible. Intuitive controls, clear instructions, and tutorials to guide you through new tasks are all clear and easy to understand. However, students will still need basic computer skills to access and navigate the platform. These skills include: using a keyboard and a mouse; running computer programs; using the Internet; sending and receiving email; using word processing programs, and using forums and other collaborative tools.

If you are not sure if you have the technical skills, the online skills course and digital literacy curriculum are both FREE resources for improving computer literacy and digital skills.

What technology requirements do I need to do the Chapmans Reflexes course?

For best outcomes, you will need high-speed Internet access, a keyboard and a computer capable of running specified online learning software. If you want to be involved with the ongoing support of voice- or web-conferencing, you will require a webcam and microphone. Be aware that sections of the LMS may not translate across to smart phones, iPhones, etc., which means you will need a laptop, tablet, netbook, or desktop computer as an alternative.

Will six months be long enough for me to complete the Chapmans Reflexes course?

Each module covers an audio content introduction on what to expect. It contains PDF documents that are included for every face-to-face participant. Each module also contains videos of the specific strength and length test, plus the treatment protocol for you to watch as often as you need.

At the end of each module, you will need to complete a short quiz to establish that you have understood the information within, AND submit a video demonstration of the exact process for test and treatment.

Each module should take no longer than a week to watch, read and answer. The time given is to allow you to provide the demonstrations that are required for actual technical assessment. You will need a camera (or someone with a good quality phone), a volunteer to administer the tests and treatment to, and someone to video the process. The verbal content will be required regarding the understanding of the process. The time required would be no longer than an hour for each process in total.

TOP MASSAGE THERAPIST REVEALS!

Easy Steps To A Bulletproof Practice

Join Paula’s tribe to receive AMAZING deals in courses and learn heaps of COOL shiz!

Back to Top
Product has been added to your cart